[05.2019]Look like a Pro, Be like a Pro: Custom Caliper Case

Description of Project
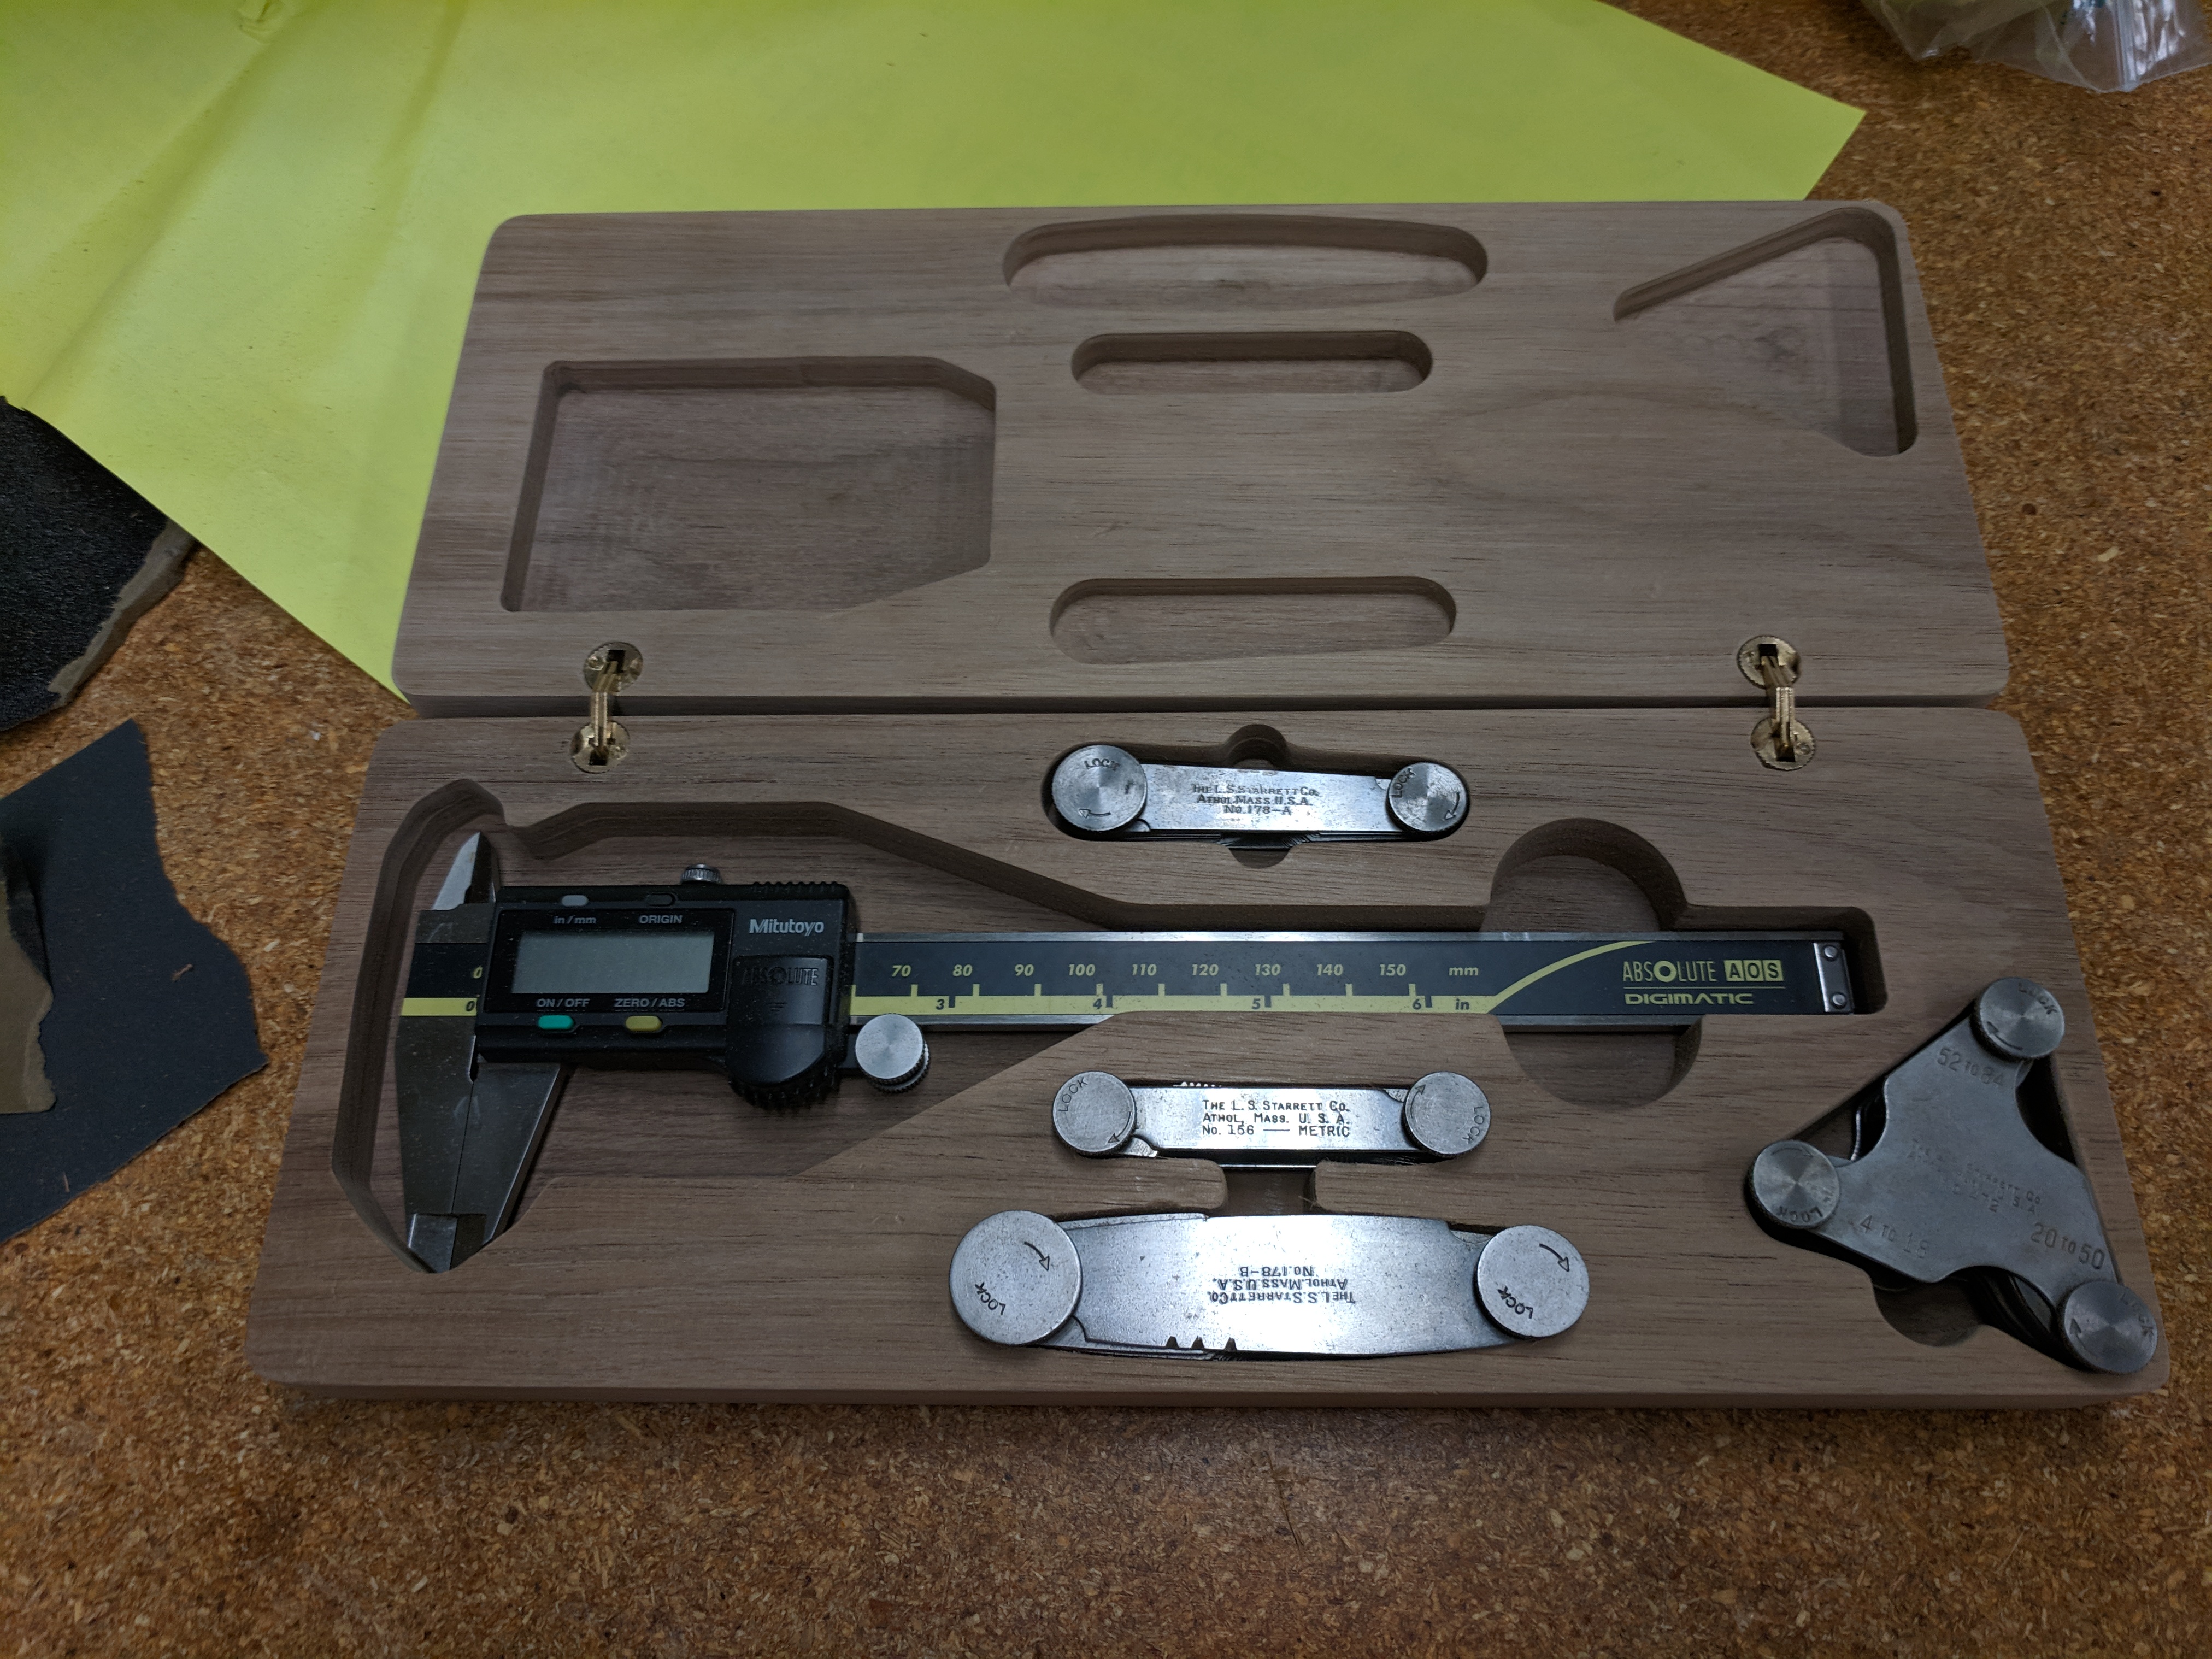
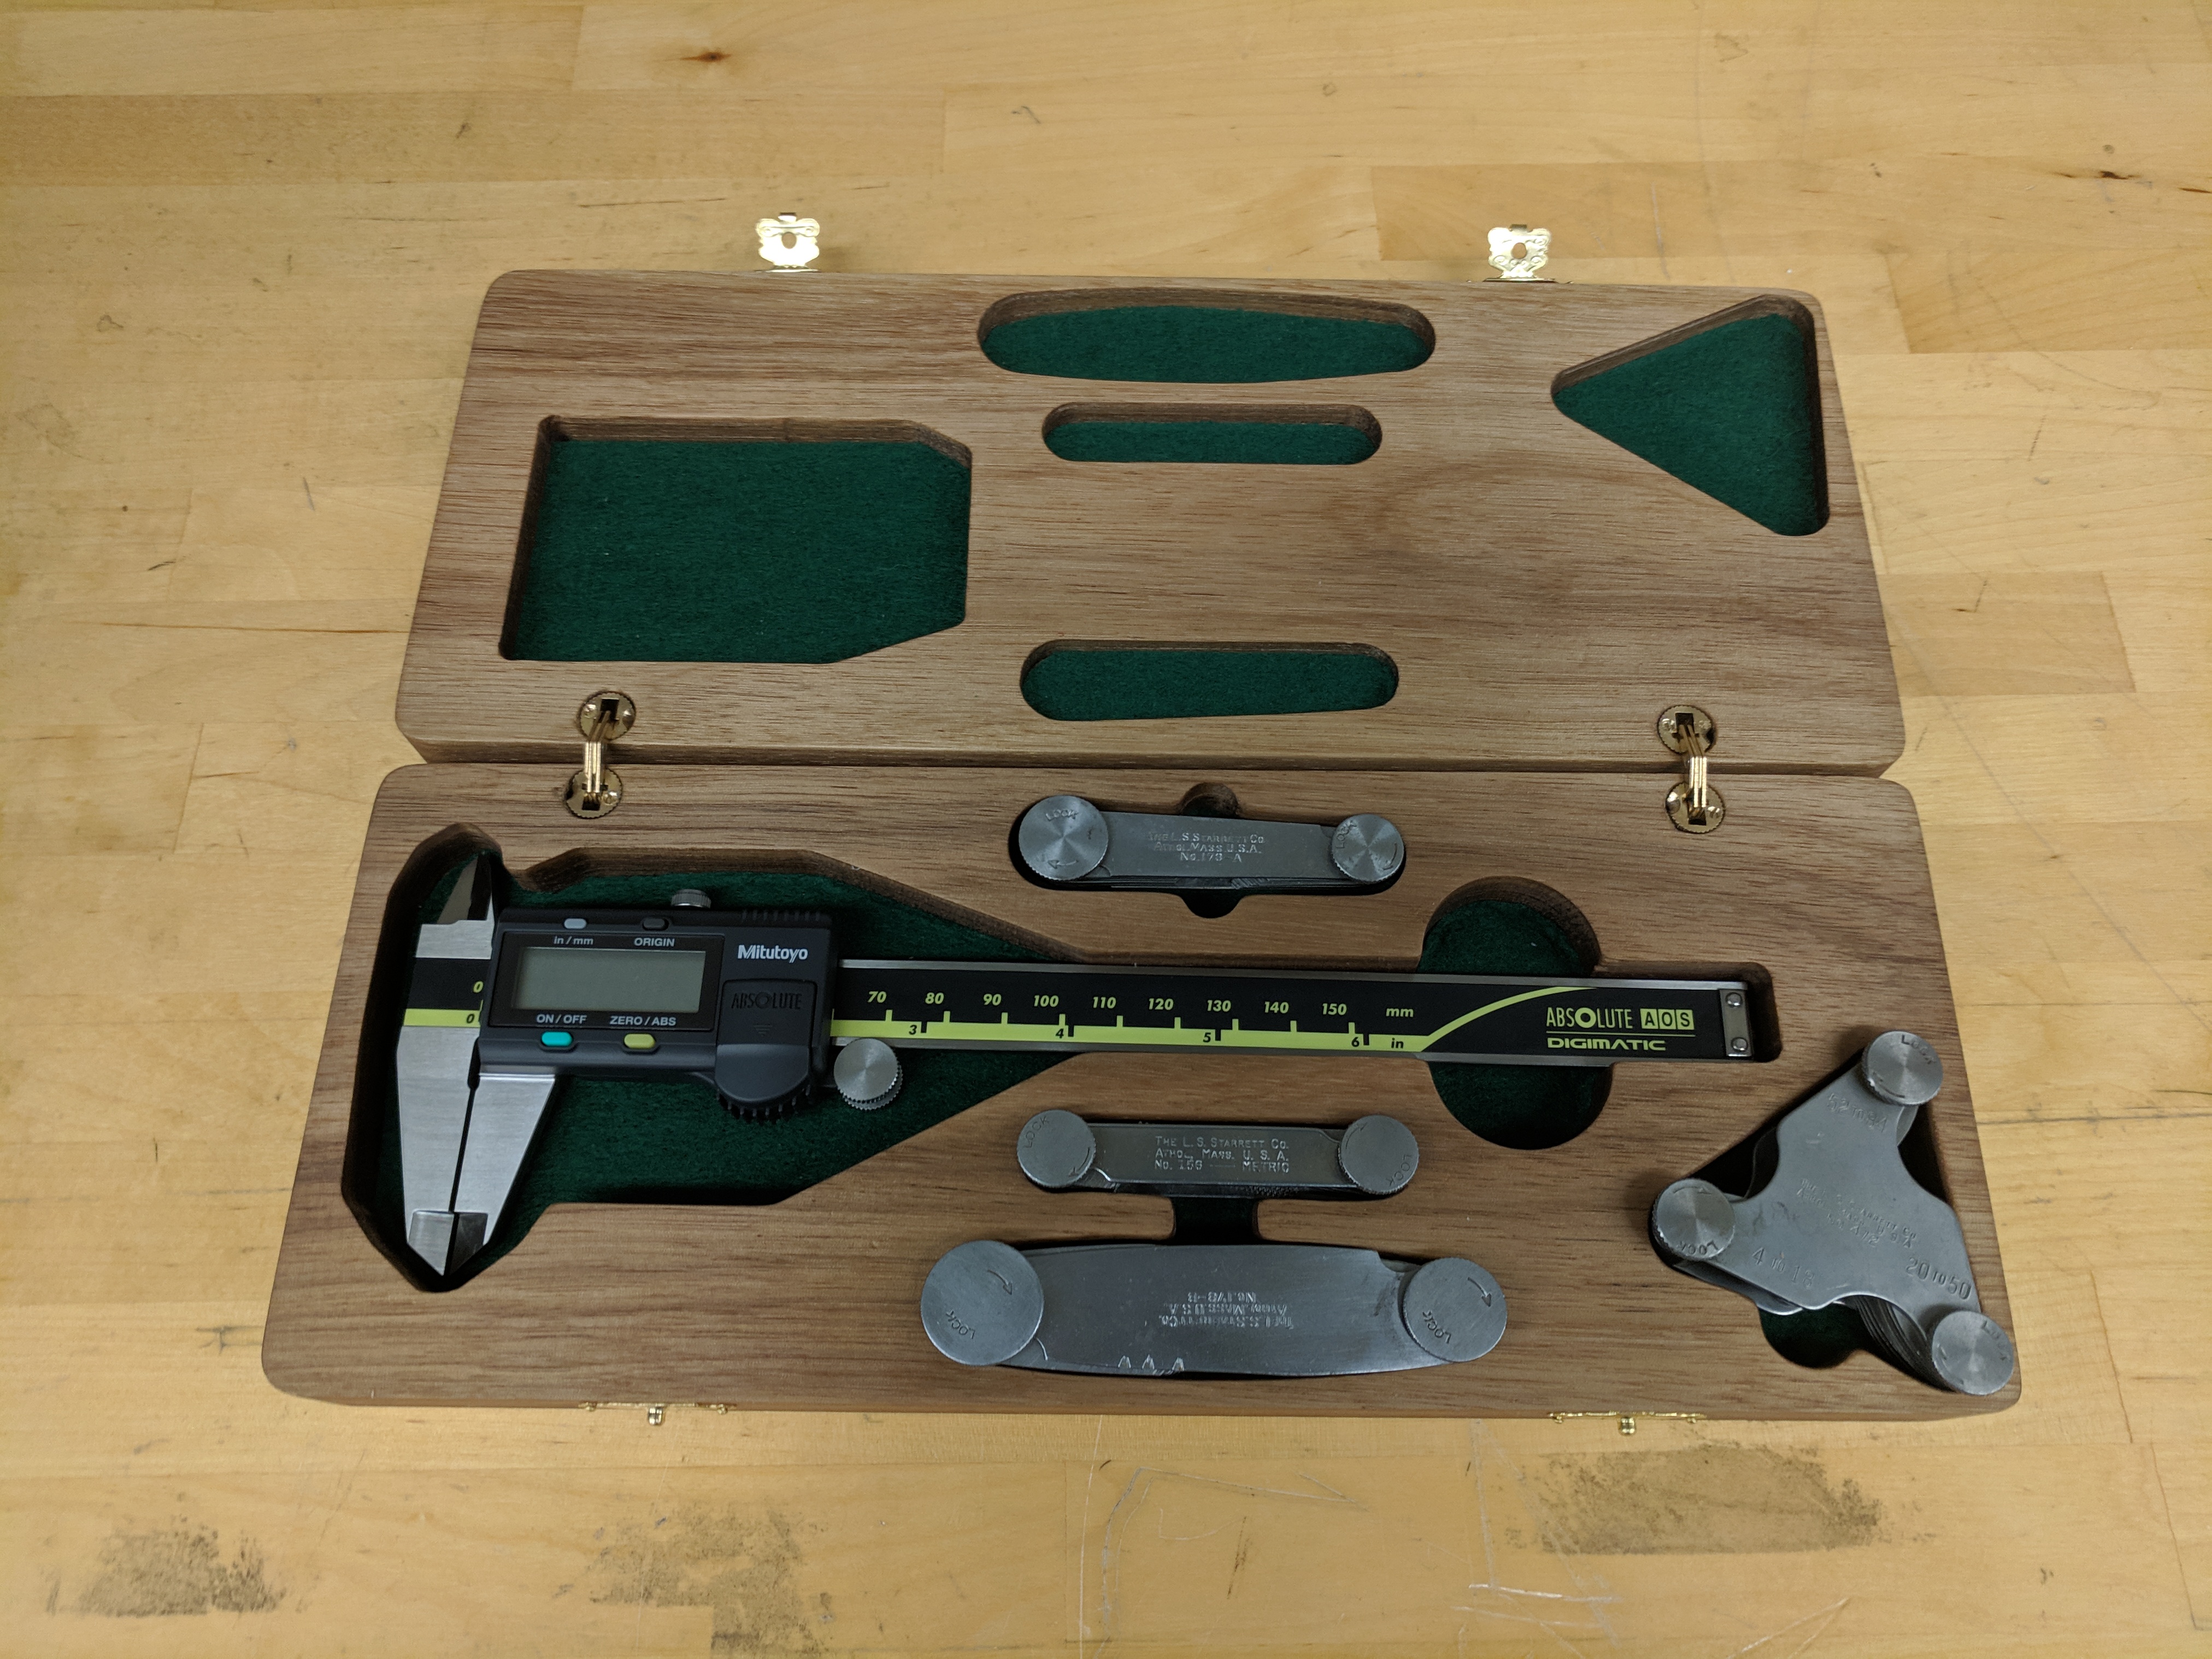
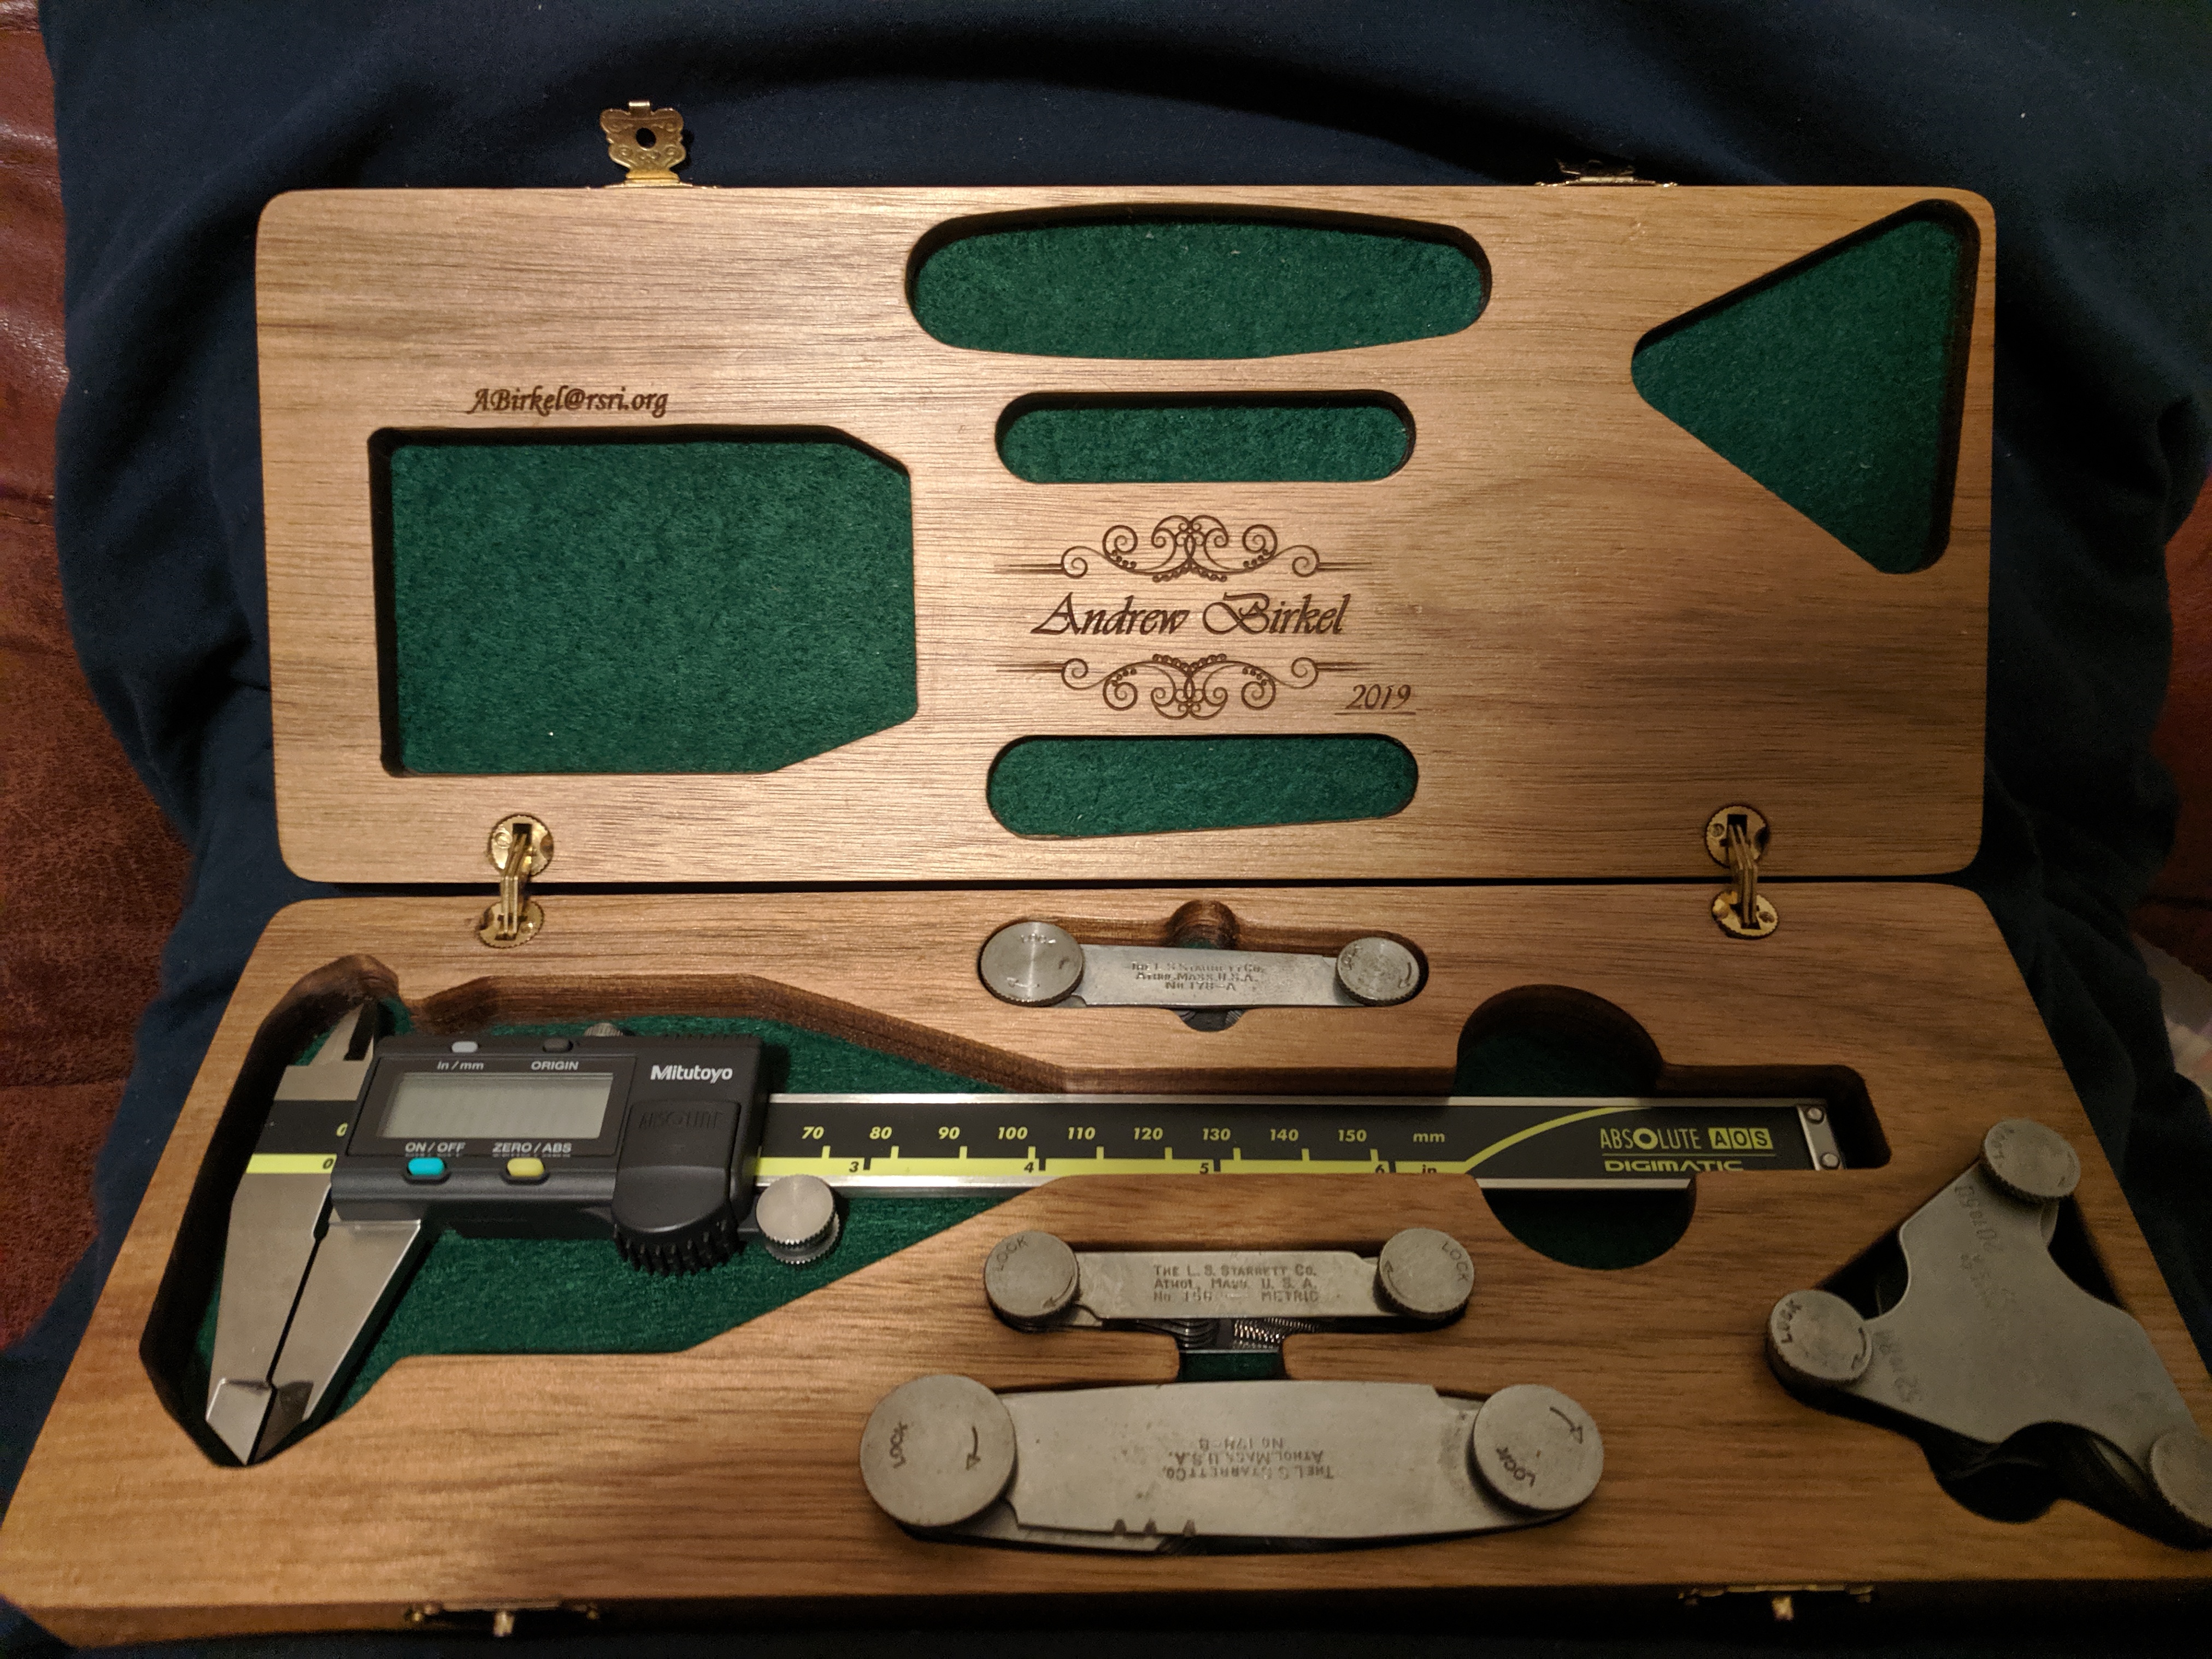
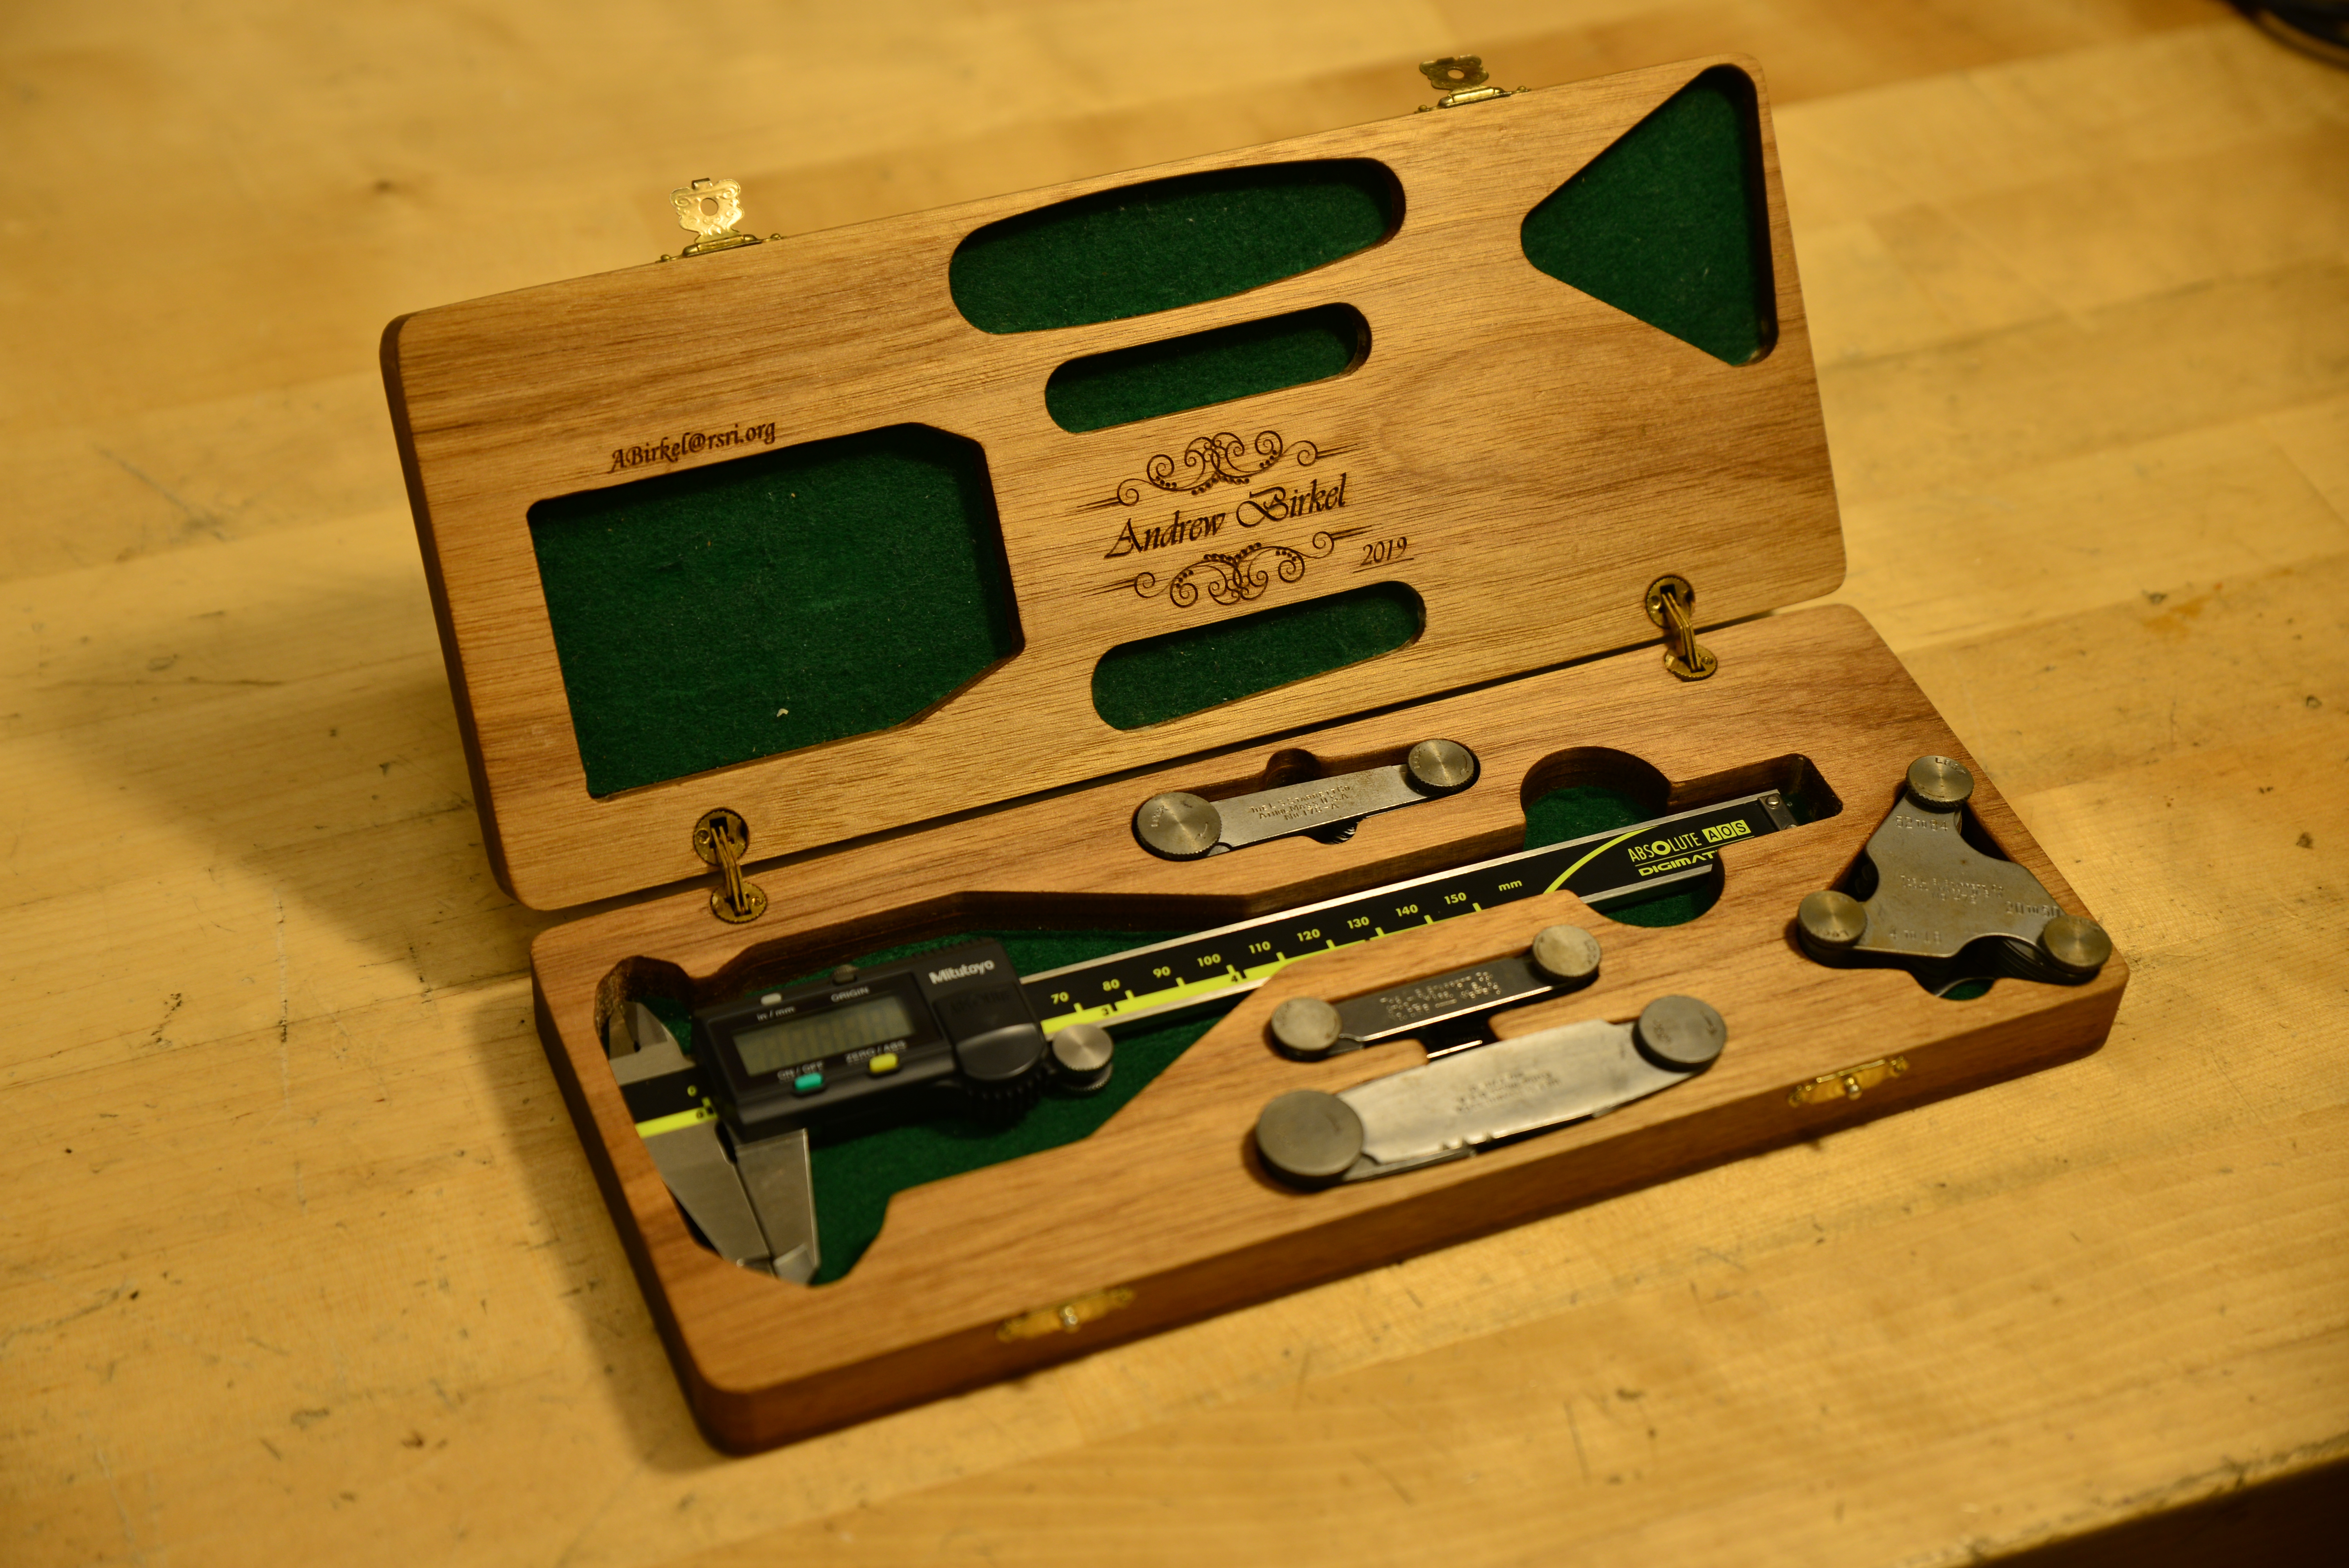
Every professional has a high quality item related to their field of study or work. This item both holds significance to themselves but also to their jobs. Along these lines, as an experimental physicist and tinkerer, I have decided to create a personalized custom case for a set of engineering tools: Mitutoyo 6" Calipers, Metric and English screw pitch gauges, small Fillet and Radius gauges, and large fillet and radius gauges. All but the calipers are vintage Starrett tooling made in Massachusetts, purchased from Ebay and Refurbished.
Processes Applied:


Metal Tools
Summary:
The groundwork for this project started over half a year before I got around to fabricating all the parts. The simple goal in the beginning was to create a nice wood case for a simple pair of calipers. But during the research phase of this project it became painfully obvious that this would neither make the project unique, challenging, or interesting. Eventually, I decided to broaden the scope of the project, that is when I started looking into what tooling should I have with my calipers. The obvious first choice was the 51 leaf screw pitch gauge. I had first seen one of these gauges years before when visiting a steam festival with my friend Rob. (Notorious owner of multiple tons of machinery). The design of this tool is elegant, simple, and just beautiful. And from my work in High Energy & High Density particle physics, I knew it was vital to match the English gauge with a metric one.
But why the fillet and radius gauges? Well, ultimately when I design something, especially if it needs to mate with another piece of hardware, I tend to do a lot of guesswork when it comes to fillets or radii. So when I came across them in the Starrett catalog during my hunt for CAD diagrams, I knew they would be useful and a more unique tool to have on hand. And that's how I decided on the tools I would carry with me for future projects. A tool to measure length, depth, and width. Two for determining threads, and two for inside and outside curvatures.
Mitutoyo 6" digital calipers 156M+ (Metric Thread gauge) 472+ (English Thread gauge - 51 Leaf) 178A+ (Fillet and Radius Gauge) 178B+ (Fillet and Radius Gauge)
Once I had my list of tooling, I started hunting down the tools themselves. The calipers were going to be brand new, but the rest of the tooling I had decided would be more sensible to hunt for deals through eBay. And that's when I made the realization that most new tooling from Starrett no longer says Athol, Mass U.S.A. on them. So I made it a point that all my gauges would be vintage tooling.
After I had purchased all the gauges, I set out an afternoon and disassembled each and every one of them carefully. The goal, cleaning off rust, built-up gunk, and re-oiling all the parts. In the past I have found WD-40 and Scotch-Brite a good solution for cleaning surface rust and gunk. So I set about soaking the parts and cleaning them. I probably spent on the order of 2 hours cleaning while watching TV. My hands were cramping a bunch but I think the end result was worth it. Vintage tooling, in arguably good shape.
Then came the waiting... Work and life hit me like a freight train. Work, I supported 7 full experimental shot days at the Lab. for Laser Energetics at the University of Rochester. This entails travel, 12-hour shot day (12 hours of work), and processing all the data. Overall this is generally a large load, but it got started the week before thanksgiving, and the last shot day wasn't until the end of January. So overall... getting my butt kicked with a bit of mandatory holiday with family in the middle :)
The burst of productivity. Two weeks before my brother was due into the U.S. with his family, he asked me to bring my nice calipers down to Maryland with me... Oh if only I had a nice fancy case to bring them in, woe is me. So that is when I decided to have the entire case done before I left for a week down in MD.
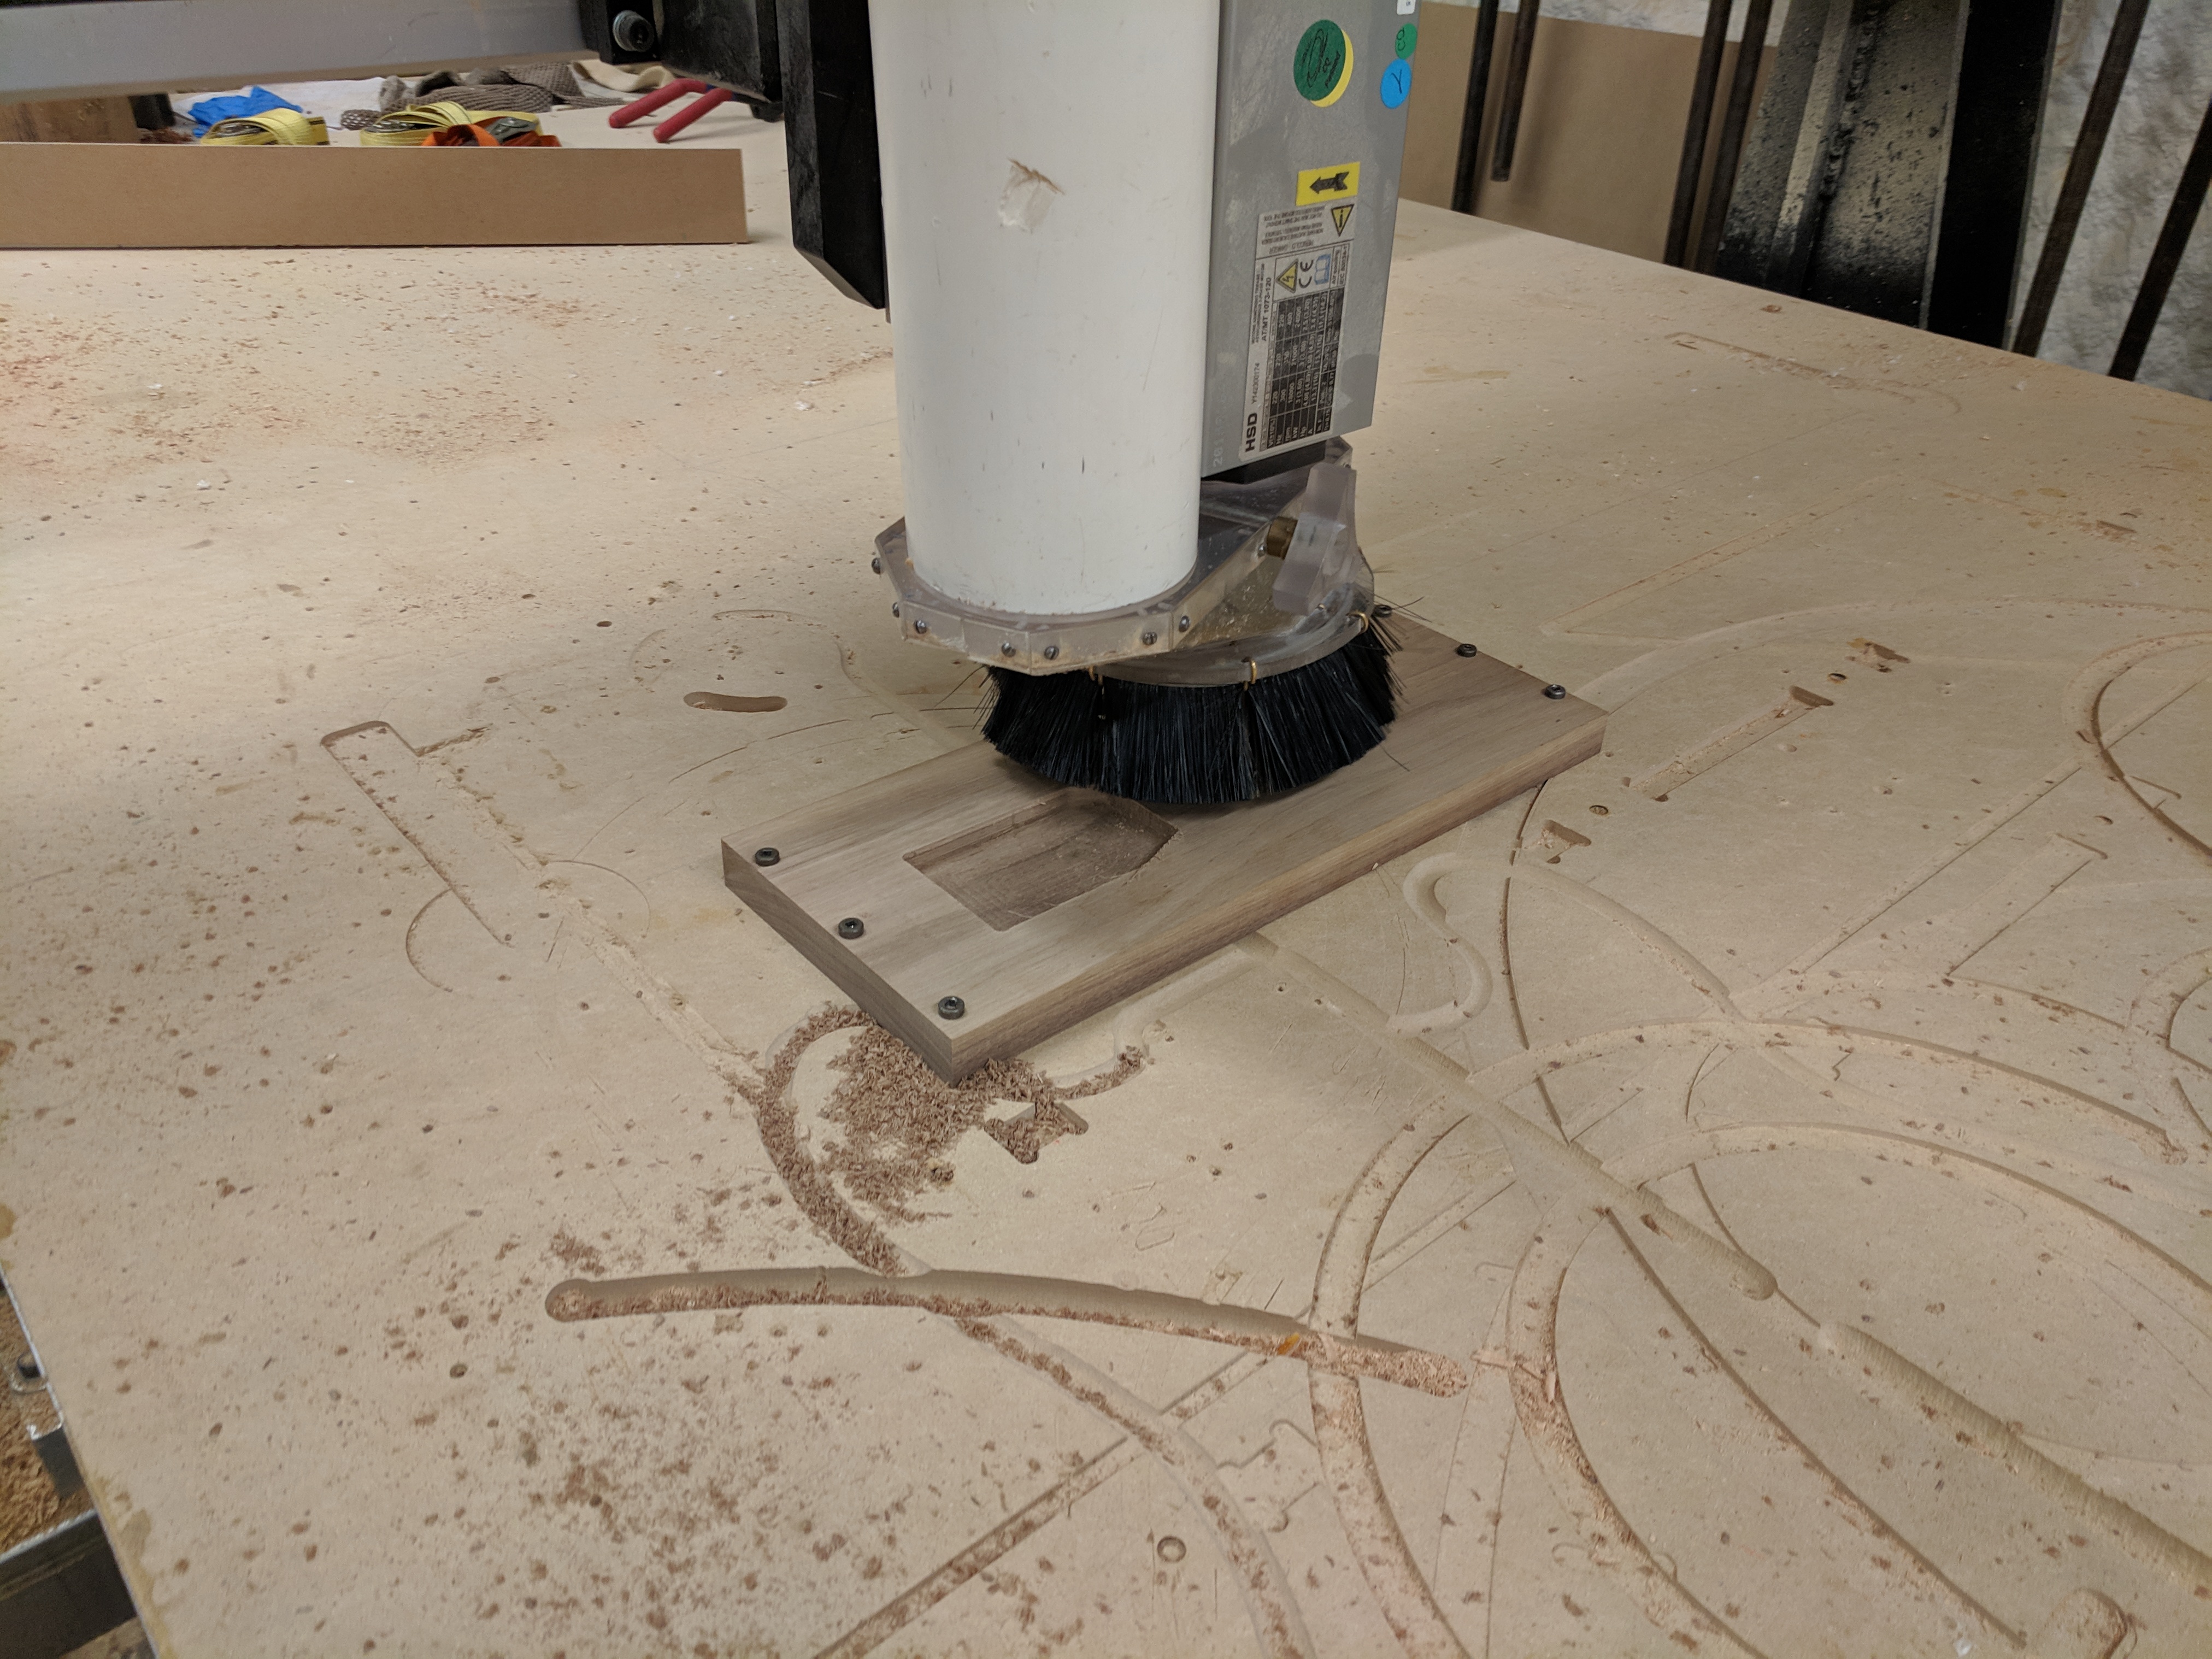
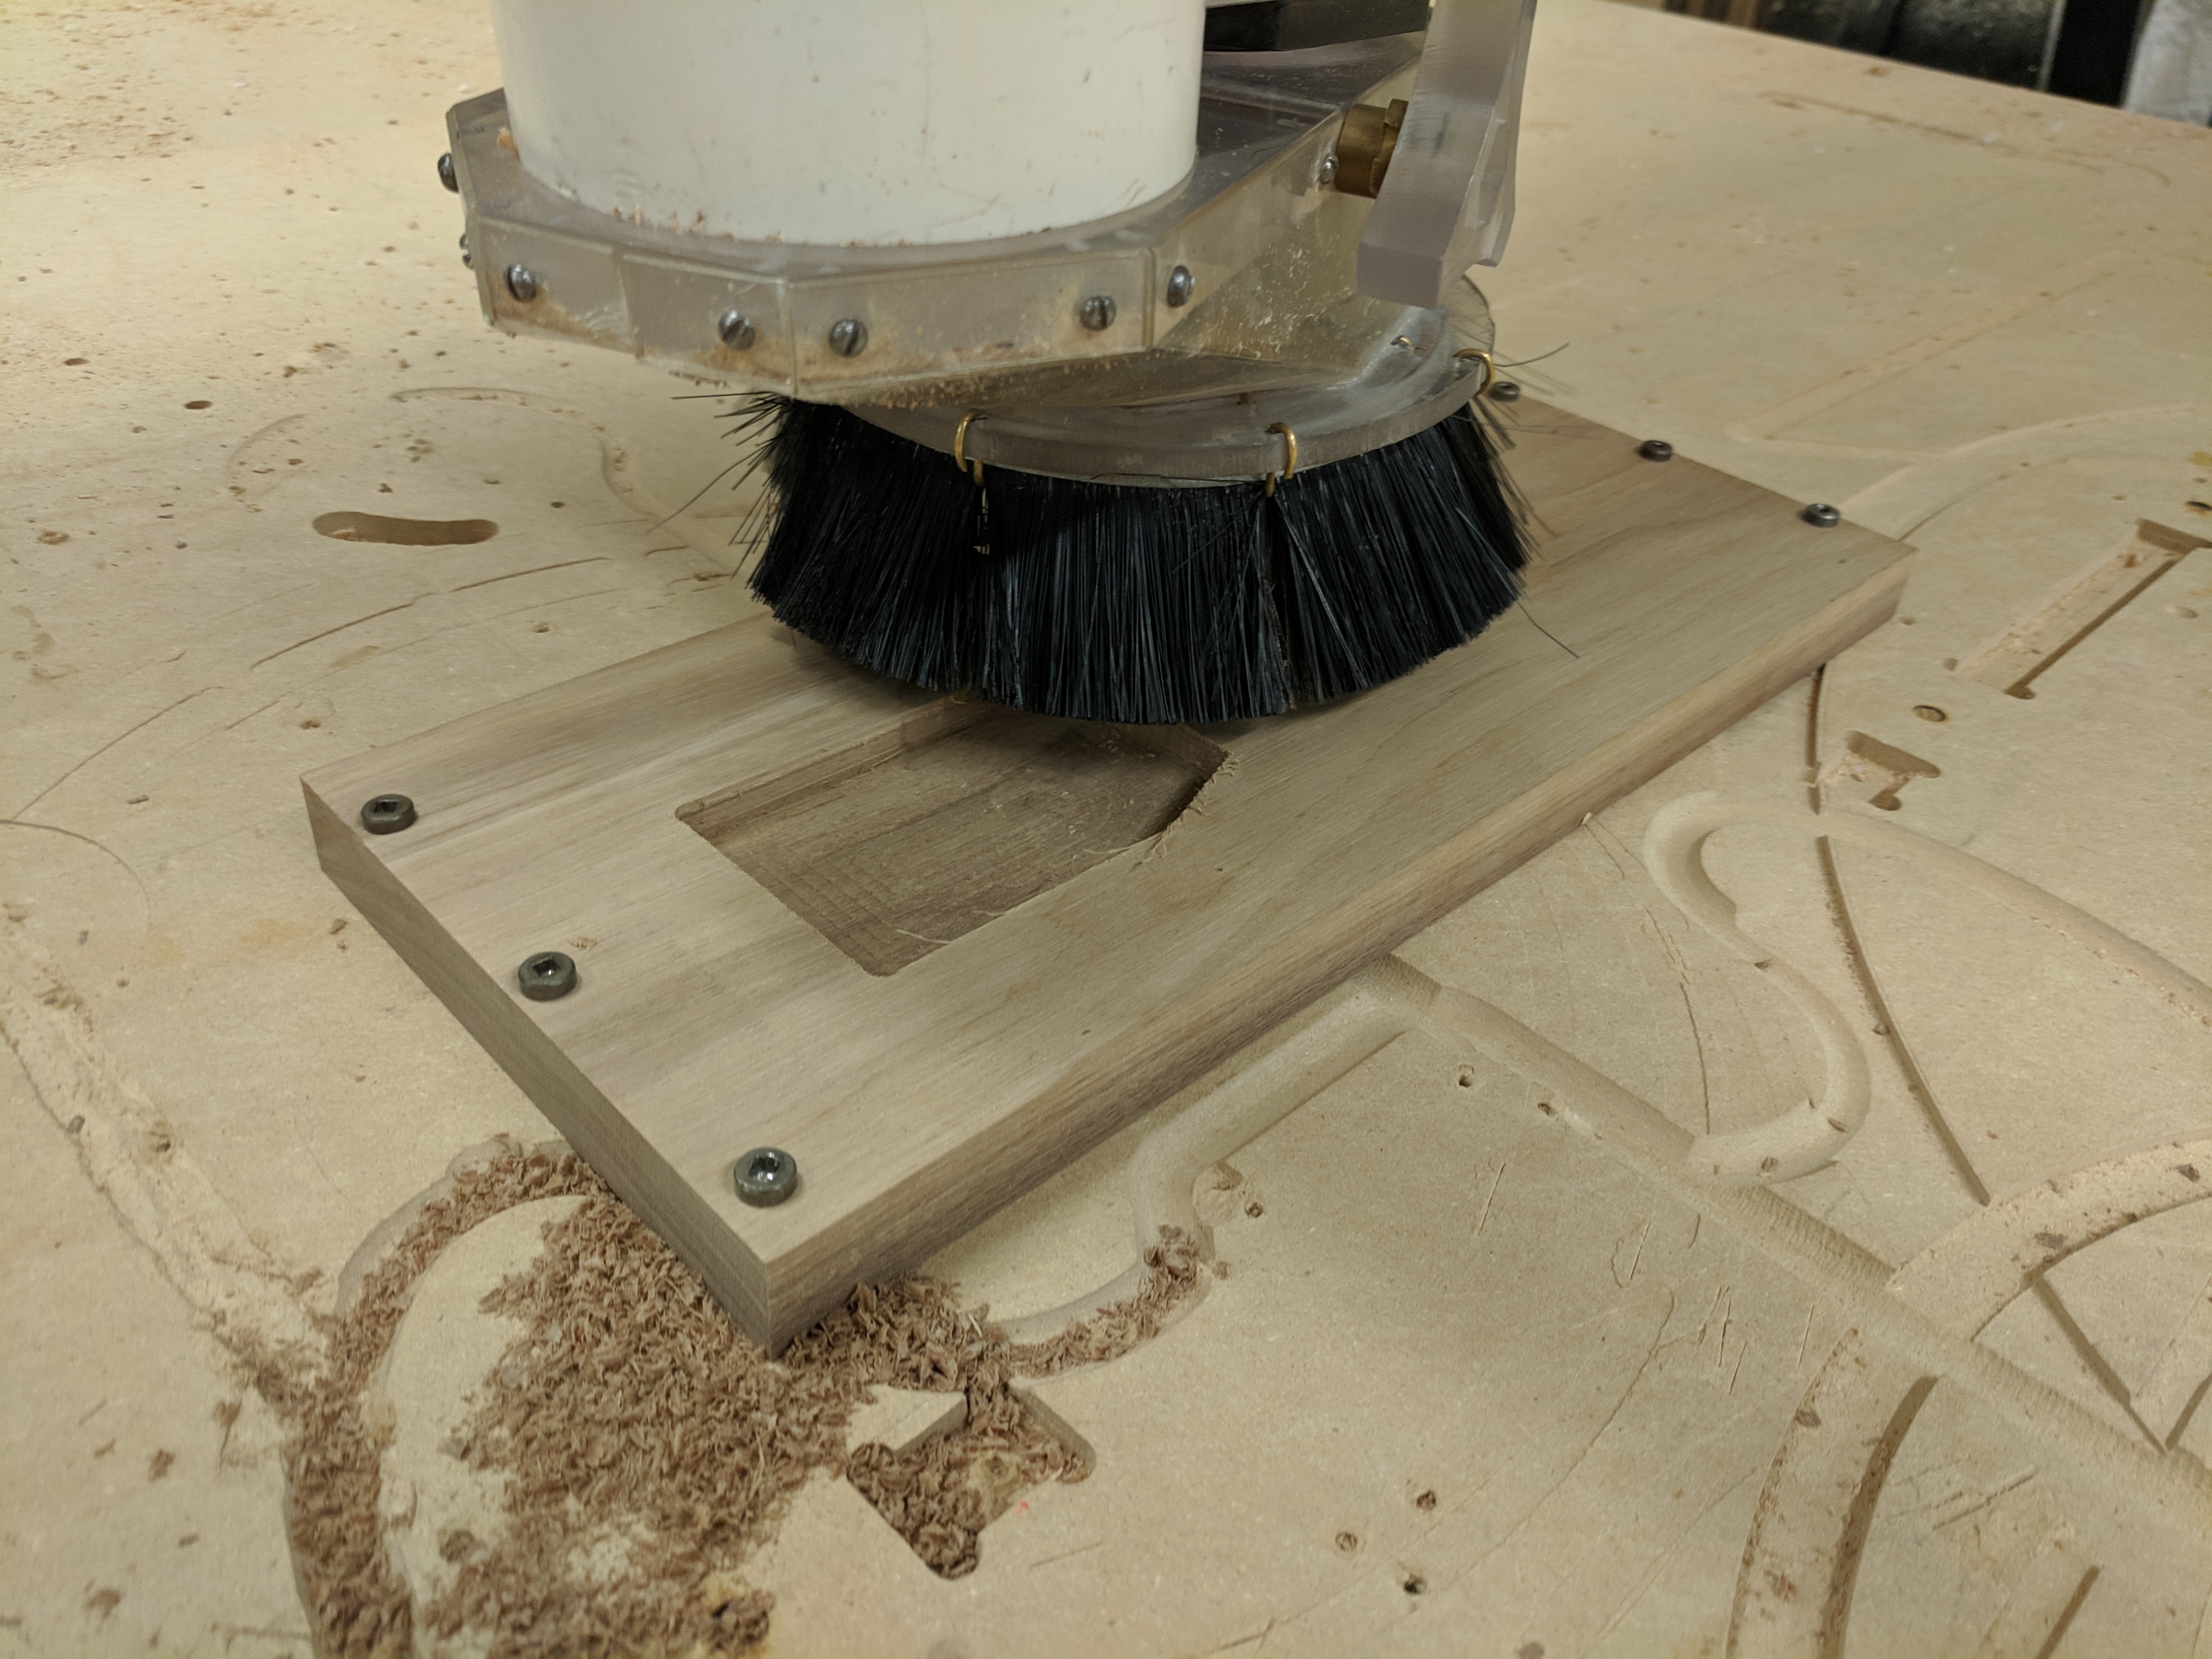
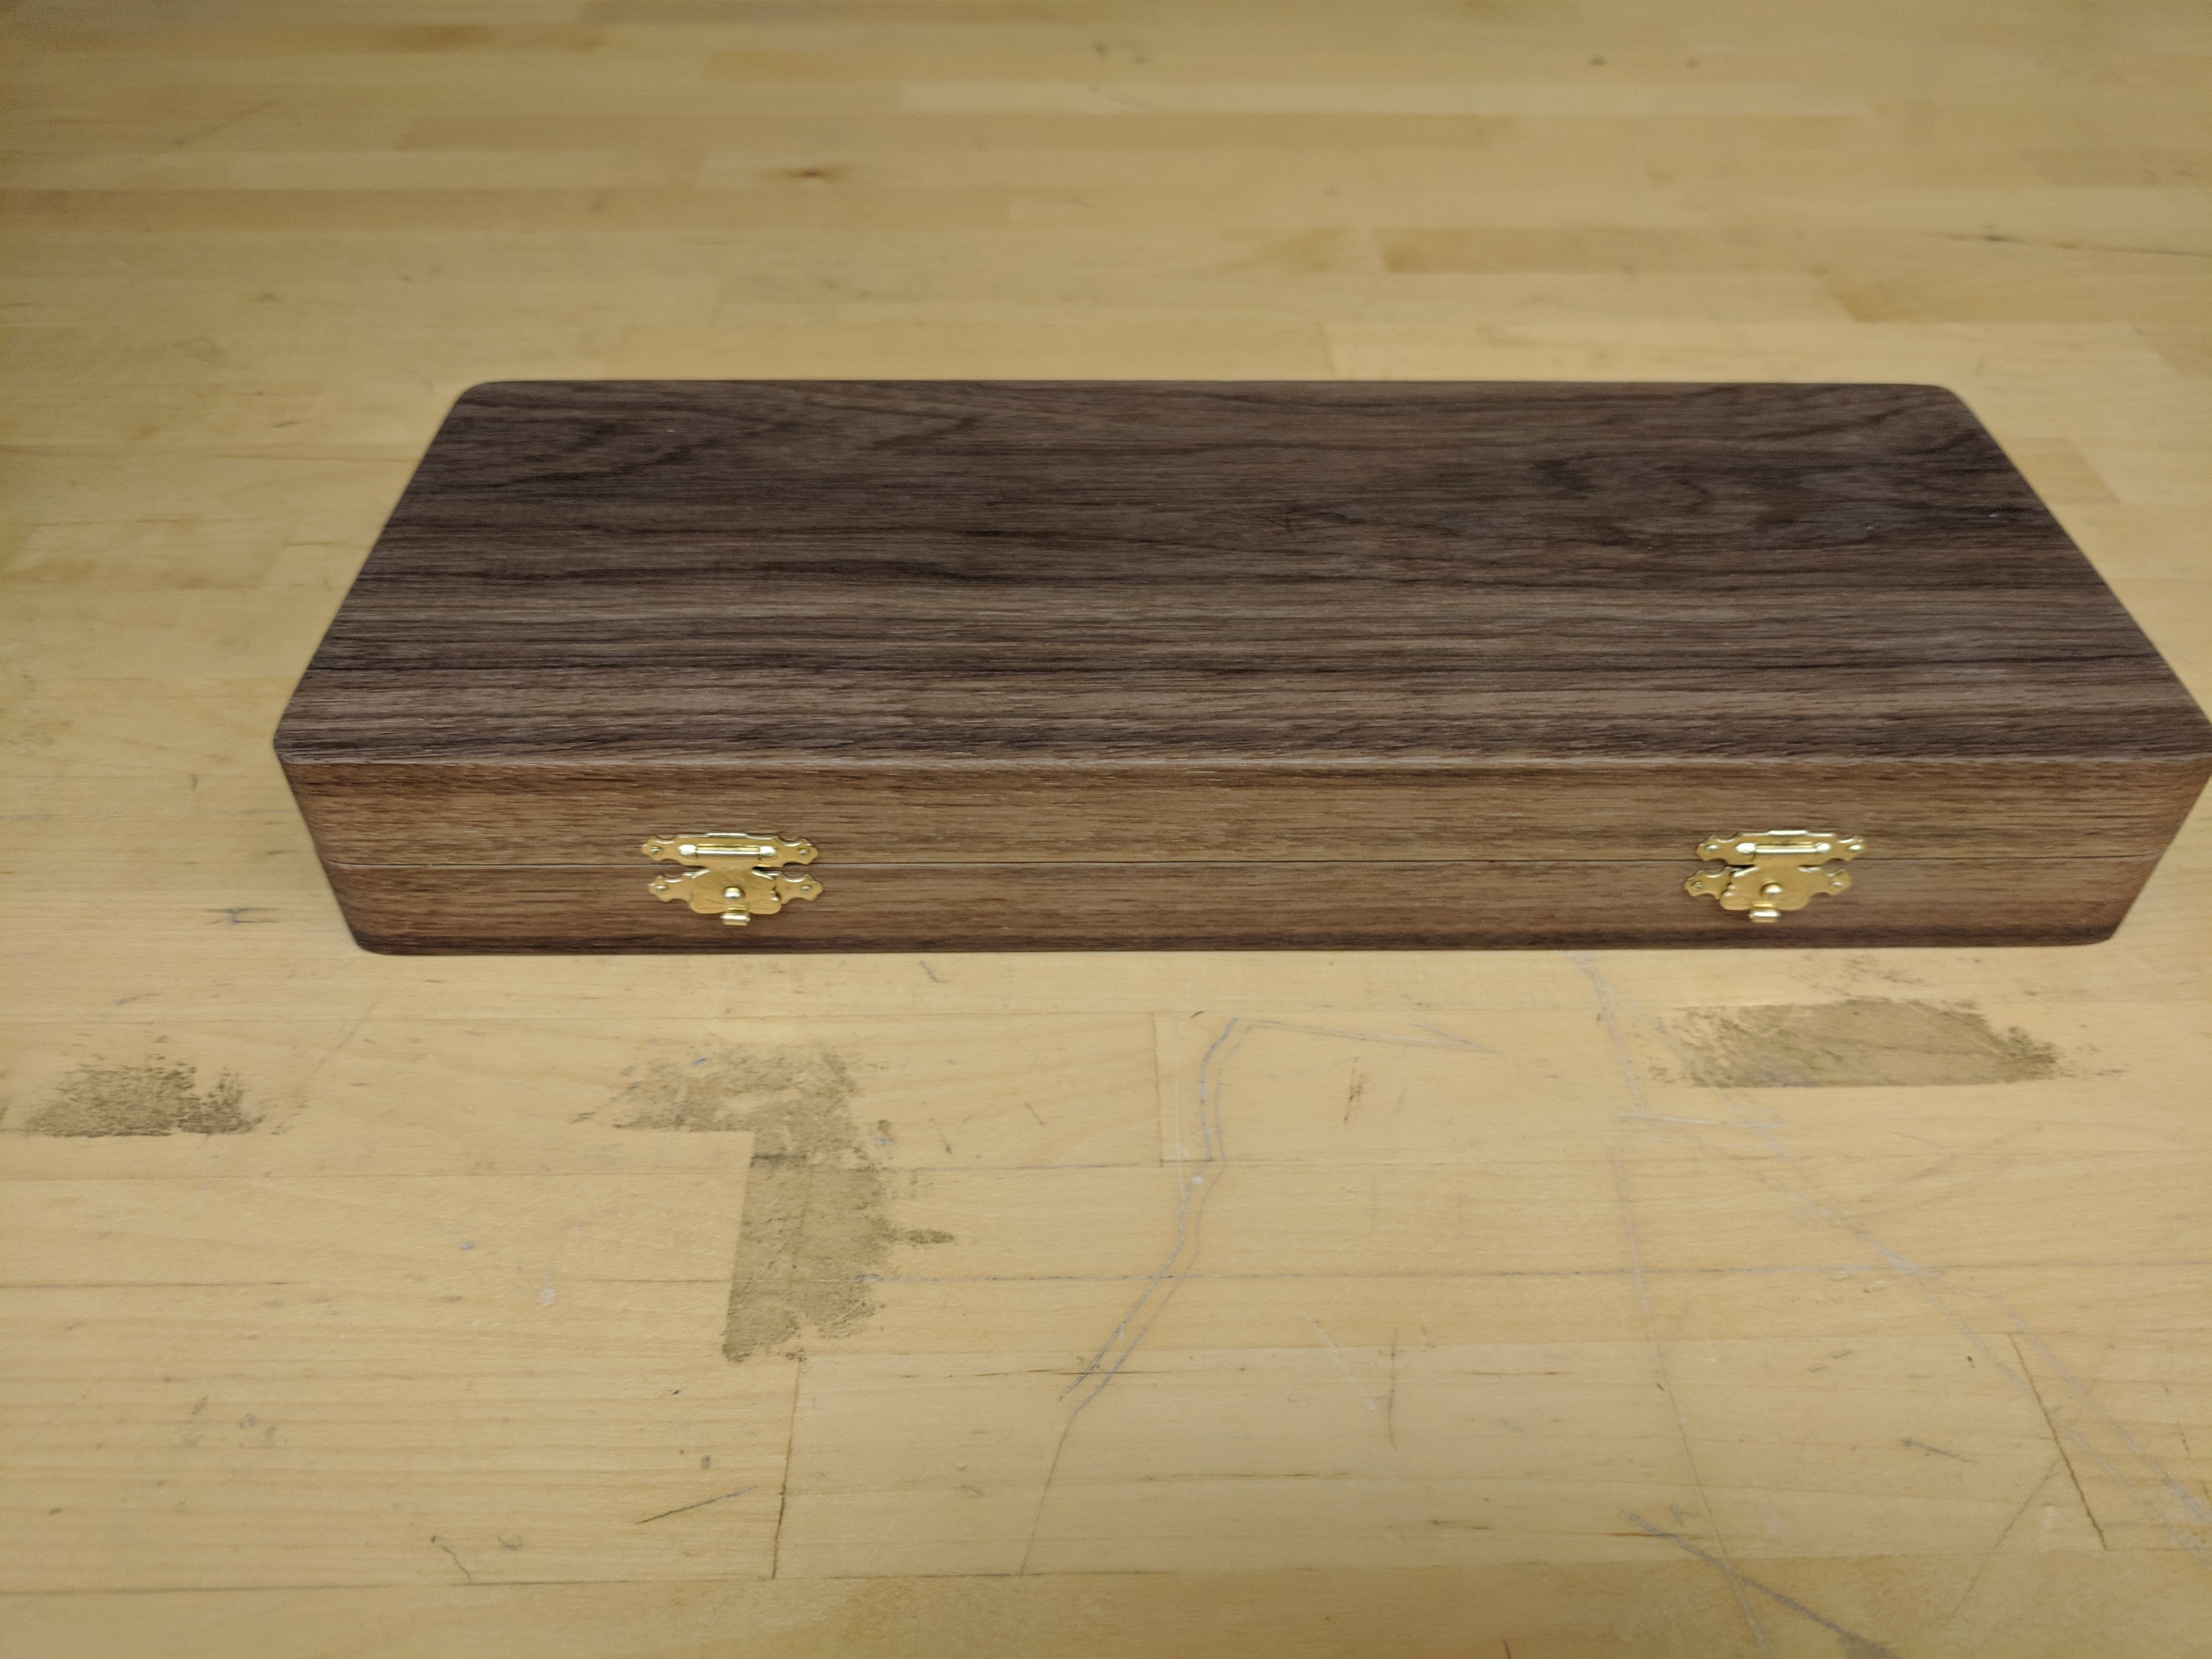
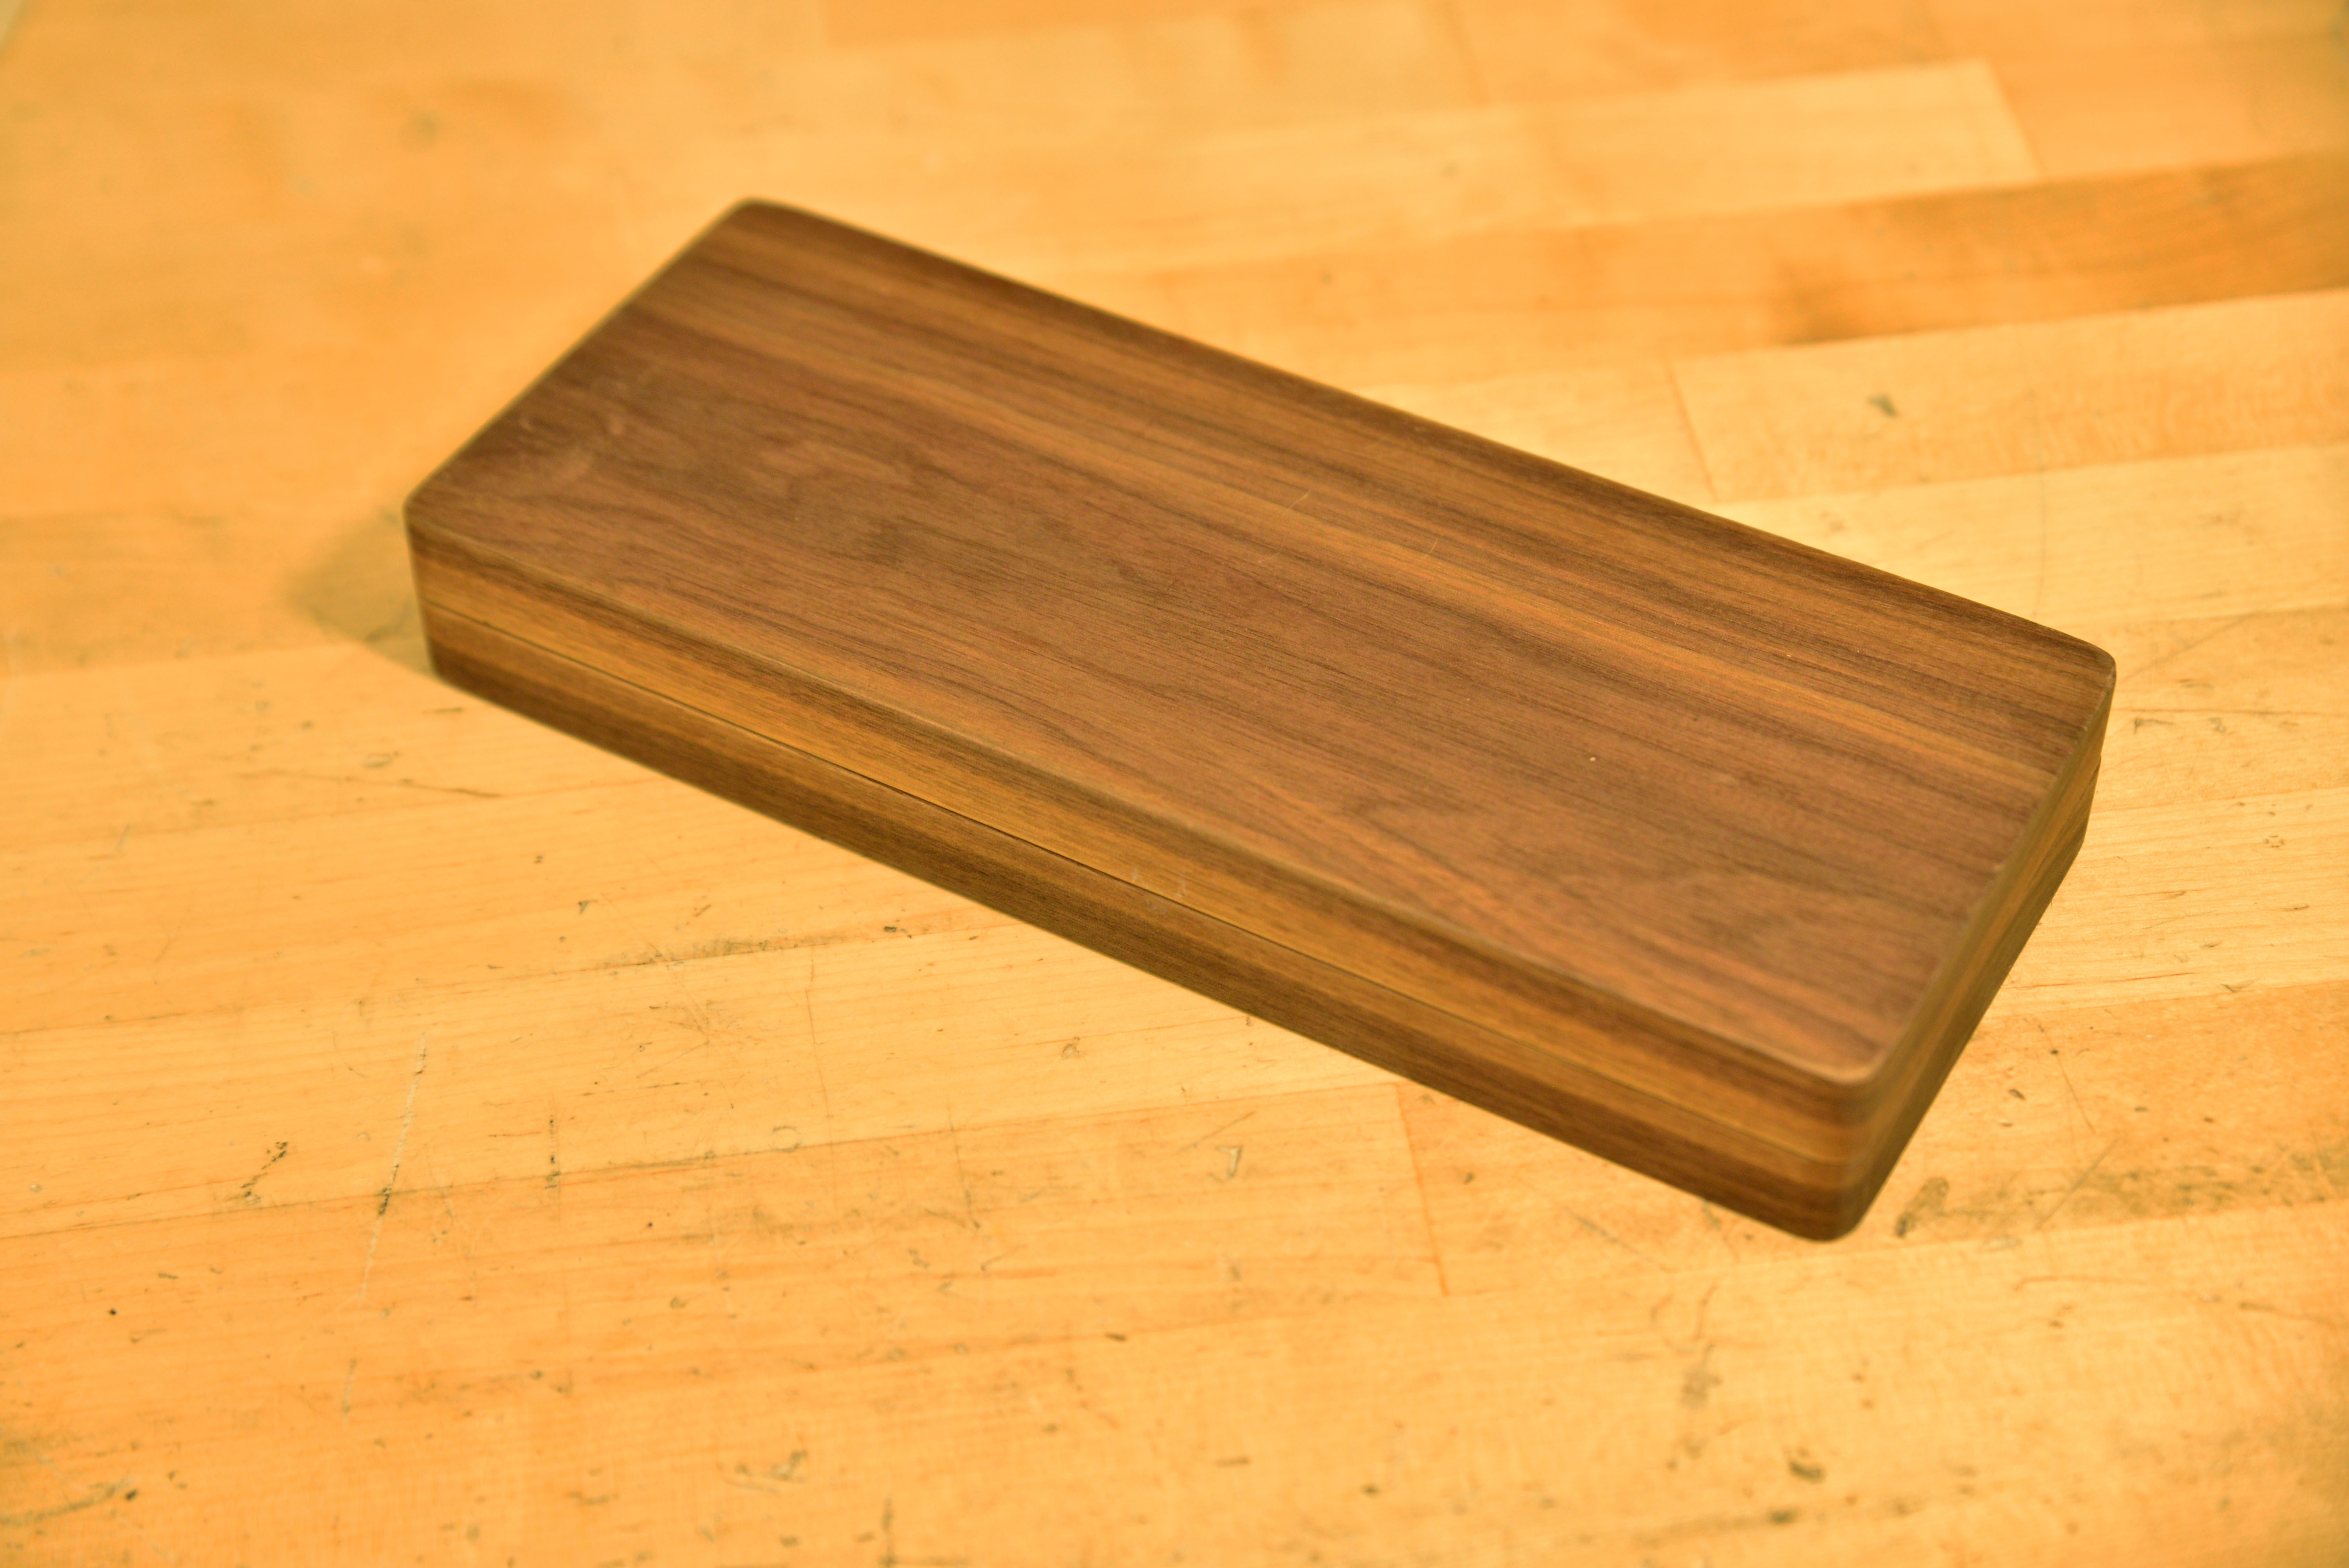
The CNC aspect of this project was pretty straightforward: I took and oversized piece of wood, drilled holes into it on the edge and mounted it to the CNC router bed. I then ran the gcode program I had made for milling out both halves of the box. Sadly I was a bit overzealous in trying to address some worries of mine, I overlooked some glaring issues. Mainly that CNC Mill with Aluminum versus CNC Router with Wood is much more forgiving, where wood has a grain structure and some operations can cause the grain to split, specifically when the bit is not fully engaged with the wood (edge cases, literally on the edge). So with this figured out, I went back the next day and reran my program with another chunk of wood. Everything turned out great, and I ended up doing some sanding and touch-up work to the two halves of the box. (that first failure actually was useful for testing out laser settings later).
Then I added my favorite part of this box, the hidden barrel hinges:
https://www.mcmaster.com/17725a4
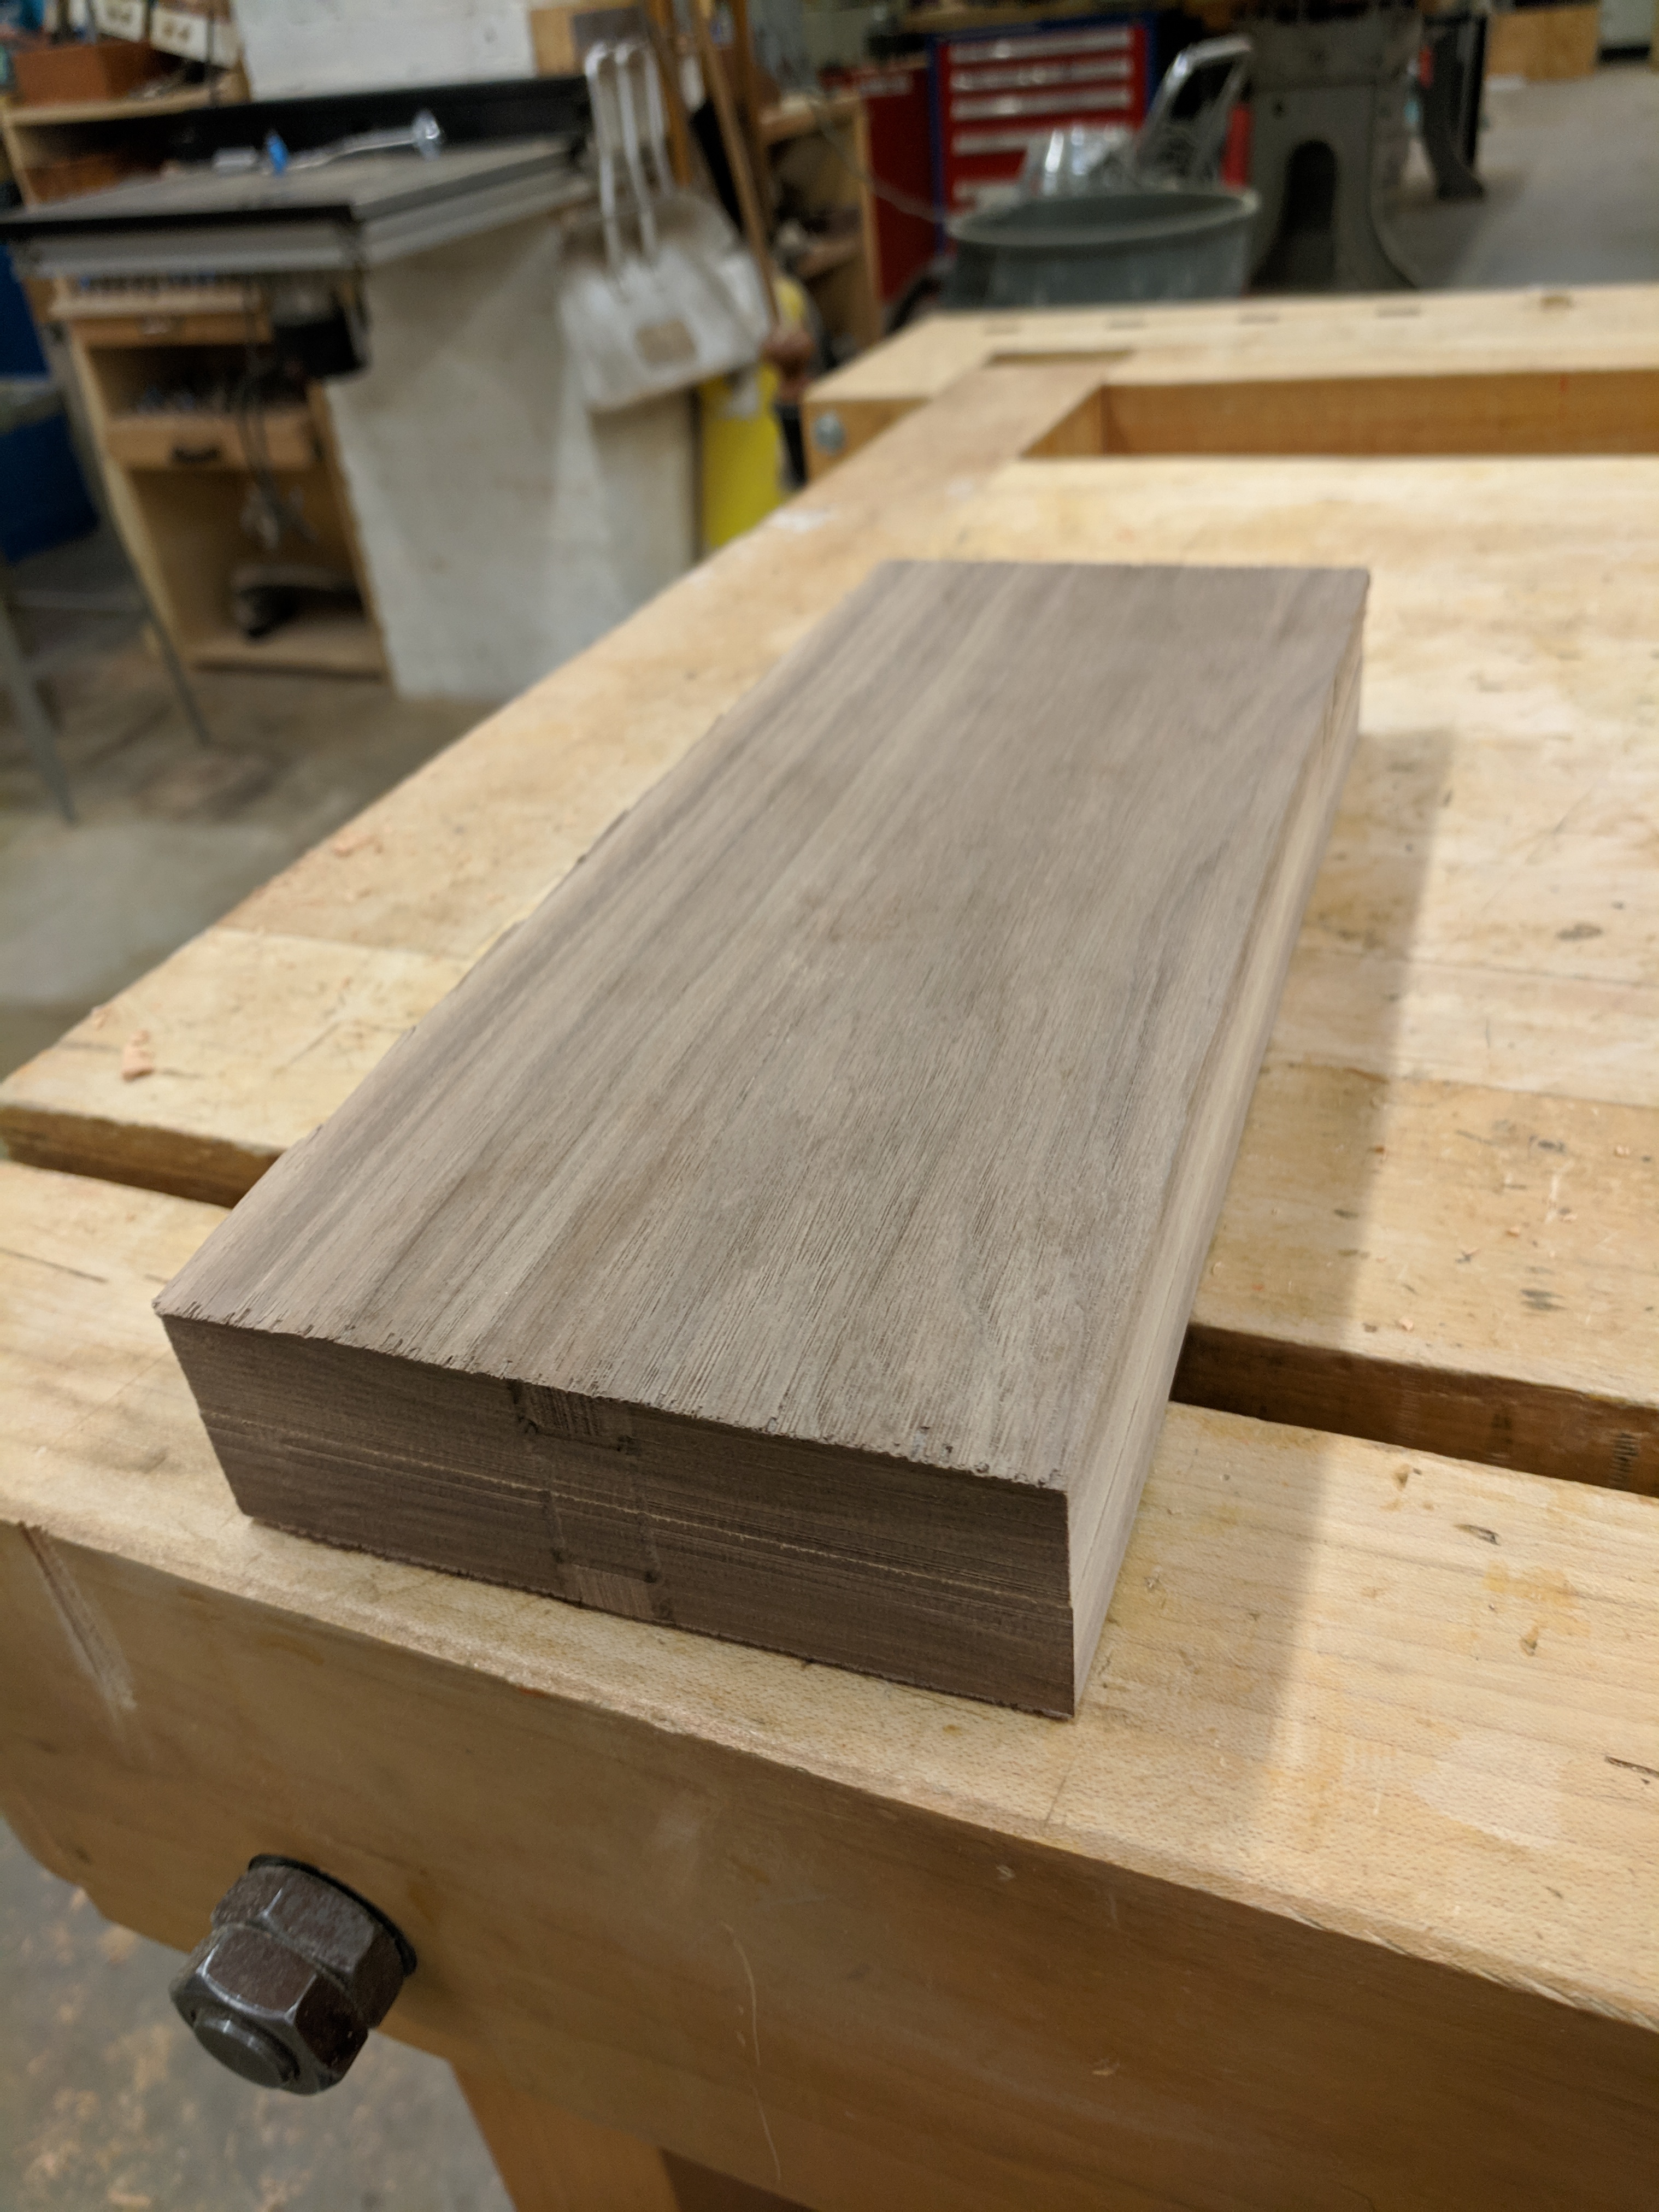
With these installed, I was able to finish cleaning up the box and verify the mating of the pieces. Once I finished all the cleanup with sandpaper, I wiped down the entire surface with mineral spirits. I finished the box with teak oil for both its use in bringing out the underlying natural color of the wood as well as the added protection it gives due to lacquer mixed into the oil.
Before I left for Maryland, I spent an afternoon cutting out the custom profiles for the adhesive-backed felt. To make the profiles exactly, I printed out 1:1 profiles from my CAD model. A really important note, when printing out 1:1 profiles using PDF as your