[Freshman Year] Fun with Magnets: Electromagnetic Projects
Description of Project
This project documents the many projects and personal research I worked on during my freshman year. This includes; An Electromagnet Magnet Maker, a Handheld Coilgun, and Research into: Mu Metal applications and ferrofluids.
Processes Applied:


Summary:
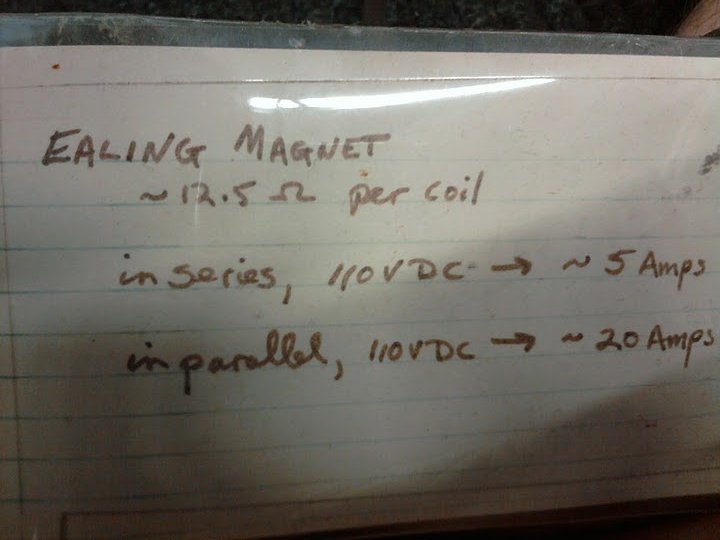
[Fall ‘08]The Magnet Maker – Industrial Size Electromagnet
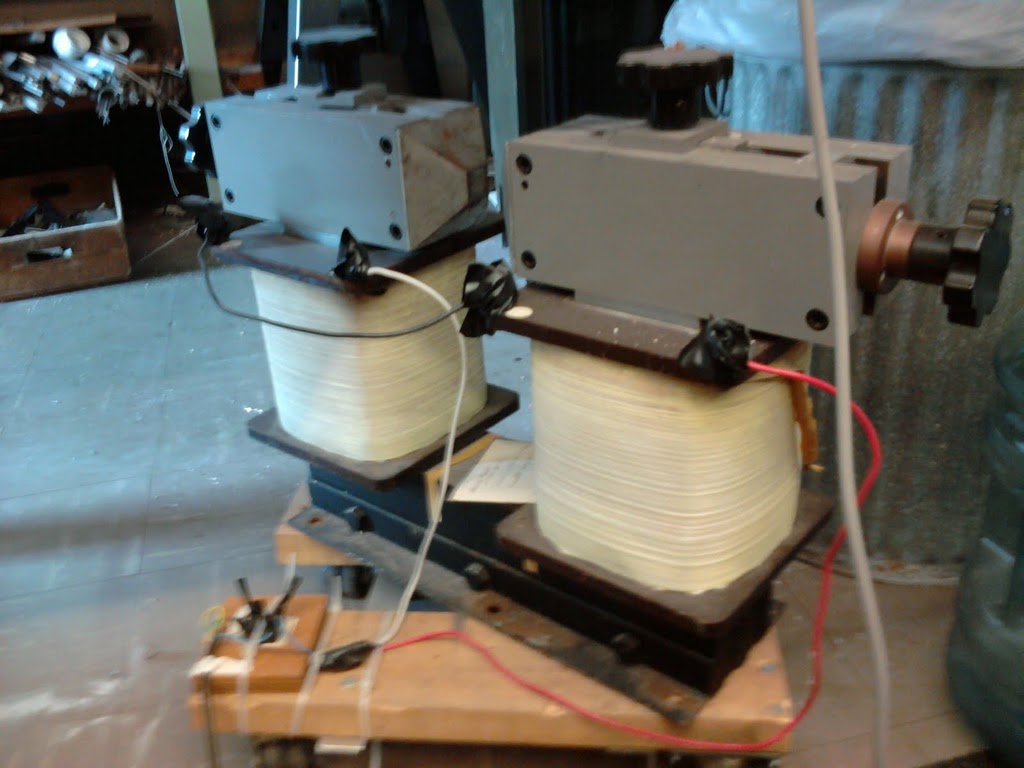
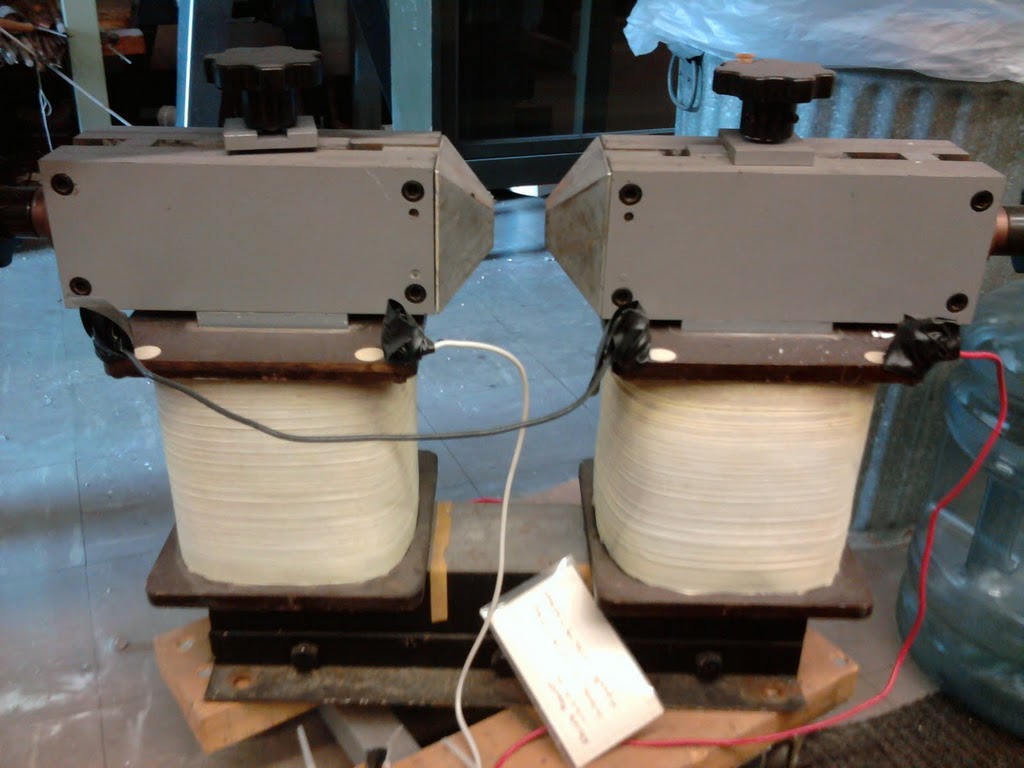
During my freshman year at RPI, I was a first year Physics student and a member in a handful of clubs.I started attending Electronic Club (E-Club) and Society of Physics Student (SPS) meetings and events. During one of the SPS meetings I got talking with one student who was building a coil-gun rig for the RPI Physics dept. as a demonstration piece. From there I started trying to find supplies for creating my own coil gun, and this is when I stumbled into the massive electromagnet while talking with the older members of the RPI Electronics Club.
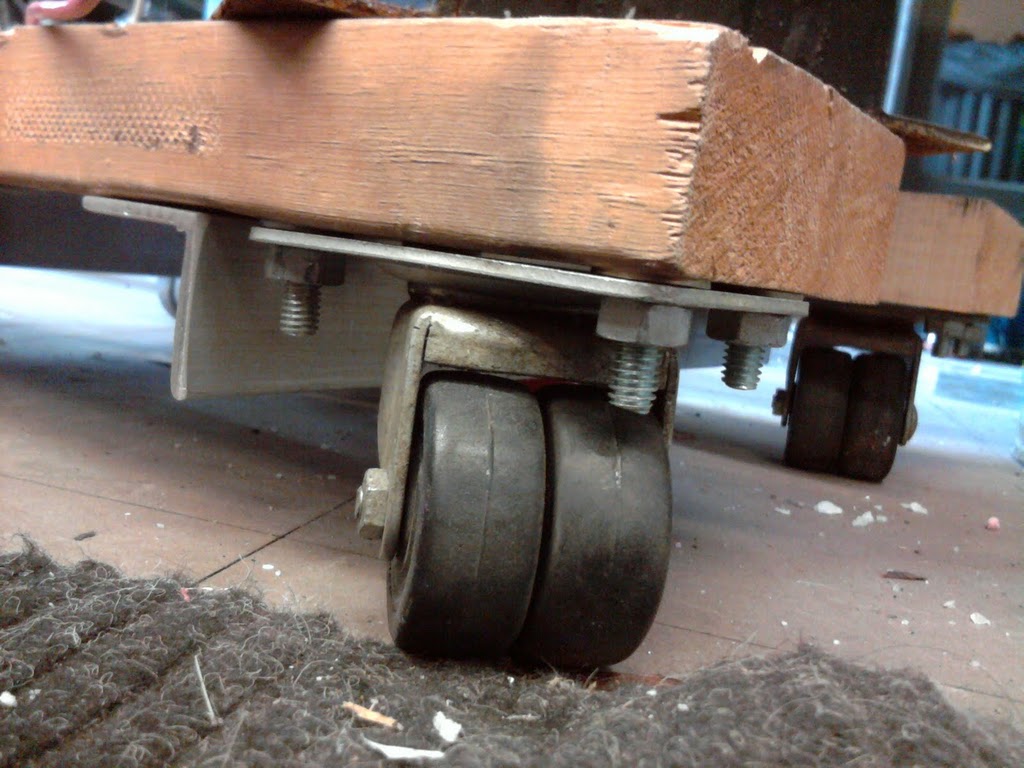
The first step of this project was making it mobile. This electromagnet has two iron cores within each coil and a steel frame creating a rigid structure between the two coils. With some assistance from professor Dwyer I was able to acquire some building materials and access to machinery required to build a rugged cart for this project. The design is simple; 4 heavy duty rubber wheels, angle iron and some two by fours. The angle iron is an important component to the design because the bend allows more weight to be supported before structural failure. So the design was two pieces of wood with a heavy duty wheel at each corner and also two angled steel beams providing support between the two pieces of wood. This ultimately became a very effective solution because it allowed an ease of mobility which was important because of the weight of the object and the lack of a dedicated cart for the magnet.
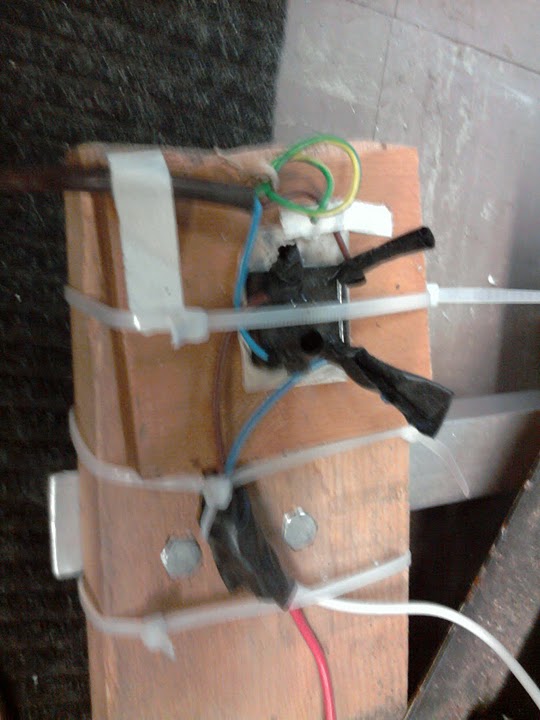
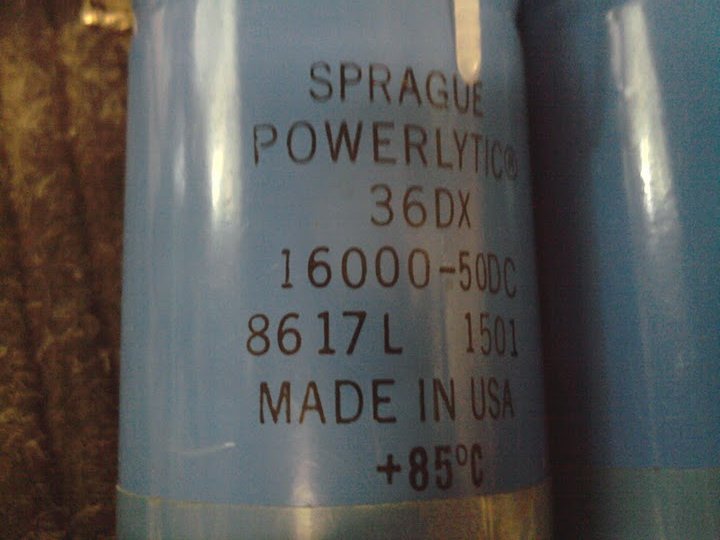
The next step was getting the electromagnet wired and powered correctly to reach the specifications of the magnet. The first way I powered the magnet was by using a department owned Variac power supply, which is a variable power supply that can be directly plugged into a standard wall outlet. Once I determined that the magnet was indeed operational I created a morepermanent solution, a simple stable bridge rectifier circuit. This circuit comprised of a stable bridge rectifier (~$5) and some resistors and wire. From this I was able to power the electromagnet close to the specifications that were with the electromagnet.
The final step of the project was testing, understanding how the electromagnet functioned and research on the correct operation of creating a permanent magnet. Things to note; using the right type of metal, for creating a permanent magnet you want to use ferromagnetic material (Note the difference between Ferromagnetic andPara-magnetic). I learned that to create a permanent magnetic we must force it in a strong magnetic field and also heat up the material allowing for the magnetic 'poles' to align which creates a stronger magnetic field. Once heated, we must let our material slowly cool while still located in the magnetic field.
In the end I perfected my technique and create a decently strong magnet. Overall the strength is quite weak when compared to aneodymium or any type of rare-earth metal magnet.
[Spring '09] The Slinger - Handheld Coil gun
My next project was focused on creating a setup which would allow for an object to be accelerated, specifically a para-magnetic material. There are two designs I looked into during the research phase of this project, a coil gun and a rail gun. One uses two conducting rails to accelerate a bridge between the two rails; the second uses a quick and large current in a coil to accelerate a projectile. These were interesting to me because of the science fiction applications of the two devices, mainly used for electric assisted space launching platforms.
In the end I chose to work on the coil gun, after working on a lot of potential solutions for a small scale rail gun. The main reason for this is the increased difficulty in keeping the rails intact and usable after a lower number of test fires.
So to build this project I got a small piece of pvc tubing, some magnet wire (~23 Gage) from Trojan Electronics (~$10) and two capacitors from E-Club. To wrap my coil I used a lathe down in the RPI Student shop at a low rotational speed. I did ~50 wraps per pass and did 2 passes. One of the main concerns with the wrapping is the spacing between each coil, the more space the less effective your coil will be. In the end I wrapped the coil in electrical tape so the coils would not unwrap and it kept anyone from accidently scraping off the coating on the wire which would short the coil, reducing the efficiency. Finally the trigger mechanism was a simply touching the wire to the plates which ultimately was effective because adding a switch could lead to a loss in effective transmission of the current.
[Drawing Board] Two projects I worked on that never passed the drawing board phase
The two projects I am referring to are the ferrofluid box and the anti-magnetic field box. These two projects were formulated when I was doing research for my other projects over the course of the school year.
The first was the ferrofluid box which was designed to be an enclosed clear box with ferrofluid inside. The aim of this project would be to create a ferrofluid and have it enclosed in a sealed box. The importance of the box being sealed came about because of the nature of the ferrofluid. The fluid is usually comprised of an oil which allows for the ferromagnetic particles to be 'loose', this oil is very messy and in a college apartment; a mess waiting to happen. Also, it offers a simple display case which can be turned into an interactive demonstration, which would be achieved by having any type of a strong magnet near any side of the box.
The second was an anti-magnetic box which I would construct out of mu metal. Mu metal is an alloy that has a high permeability to magnetic fields, but this allows for the metal to shield against low frequency or non-changing magnetic fields. This box would then be a box that allows for shielding against static or slow varying magnetic fields. Ultimately, this project got shelved for two reasons; one the high cost of the alloy and second the inability to shield sufficiently against projects where I don’t have complete control of the frequency at which the magnetic field fluctuates. (The Large magnet has no way to slowly ramp up, it goes from off to Full strength on and the coil gun's nature requires high frequency magnetic field.)